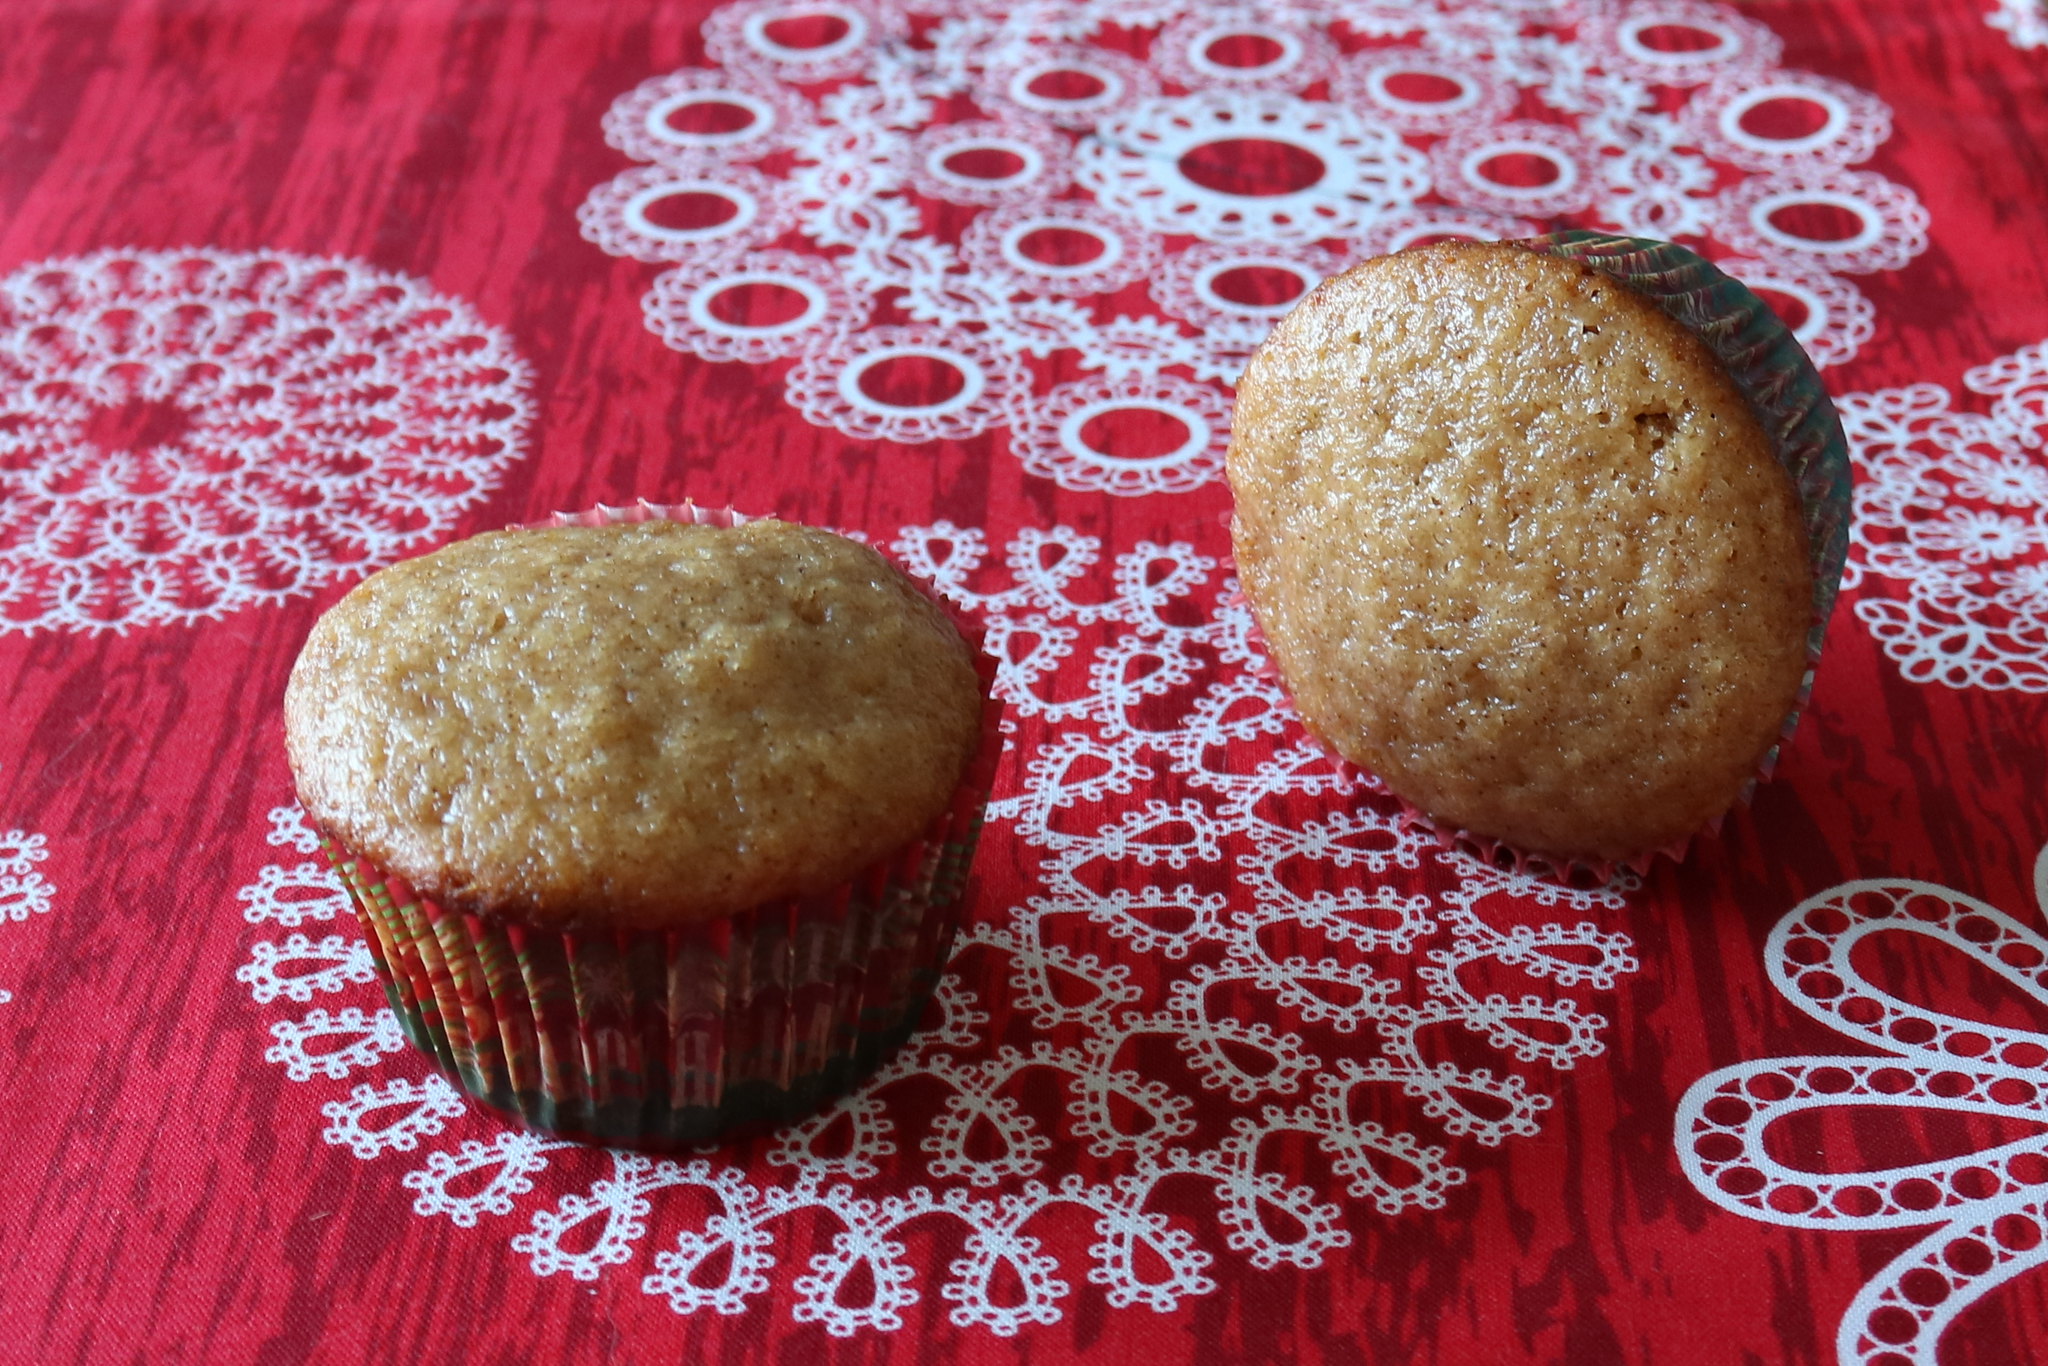
Spiced Honey Muffins
As I’m going to Brazil for the holidays, I didn’t bother decorating our place for Christmas this year. But this created a little issue for the blog, as I had kinda forgotten to start the edible gifts series here! 😀
To correct this error, there’s nothing easier than a quick recipe: muffins – in 40 minutes, you go from random ingredients in your pantry to a delicious treat! Patricia’s original recipe is more subtle than mine: in total, she used 1 tsp of spices. As we like bolder flavors around here, and I wanted something that screamed “Christmas!,” I tripled that amount!
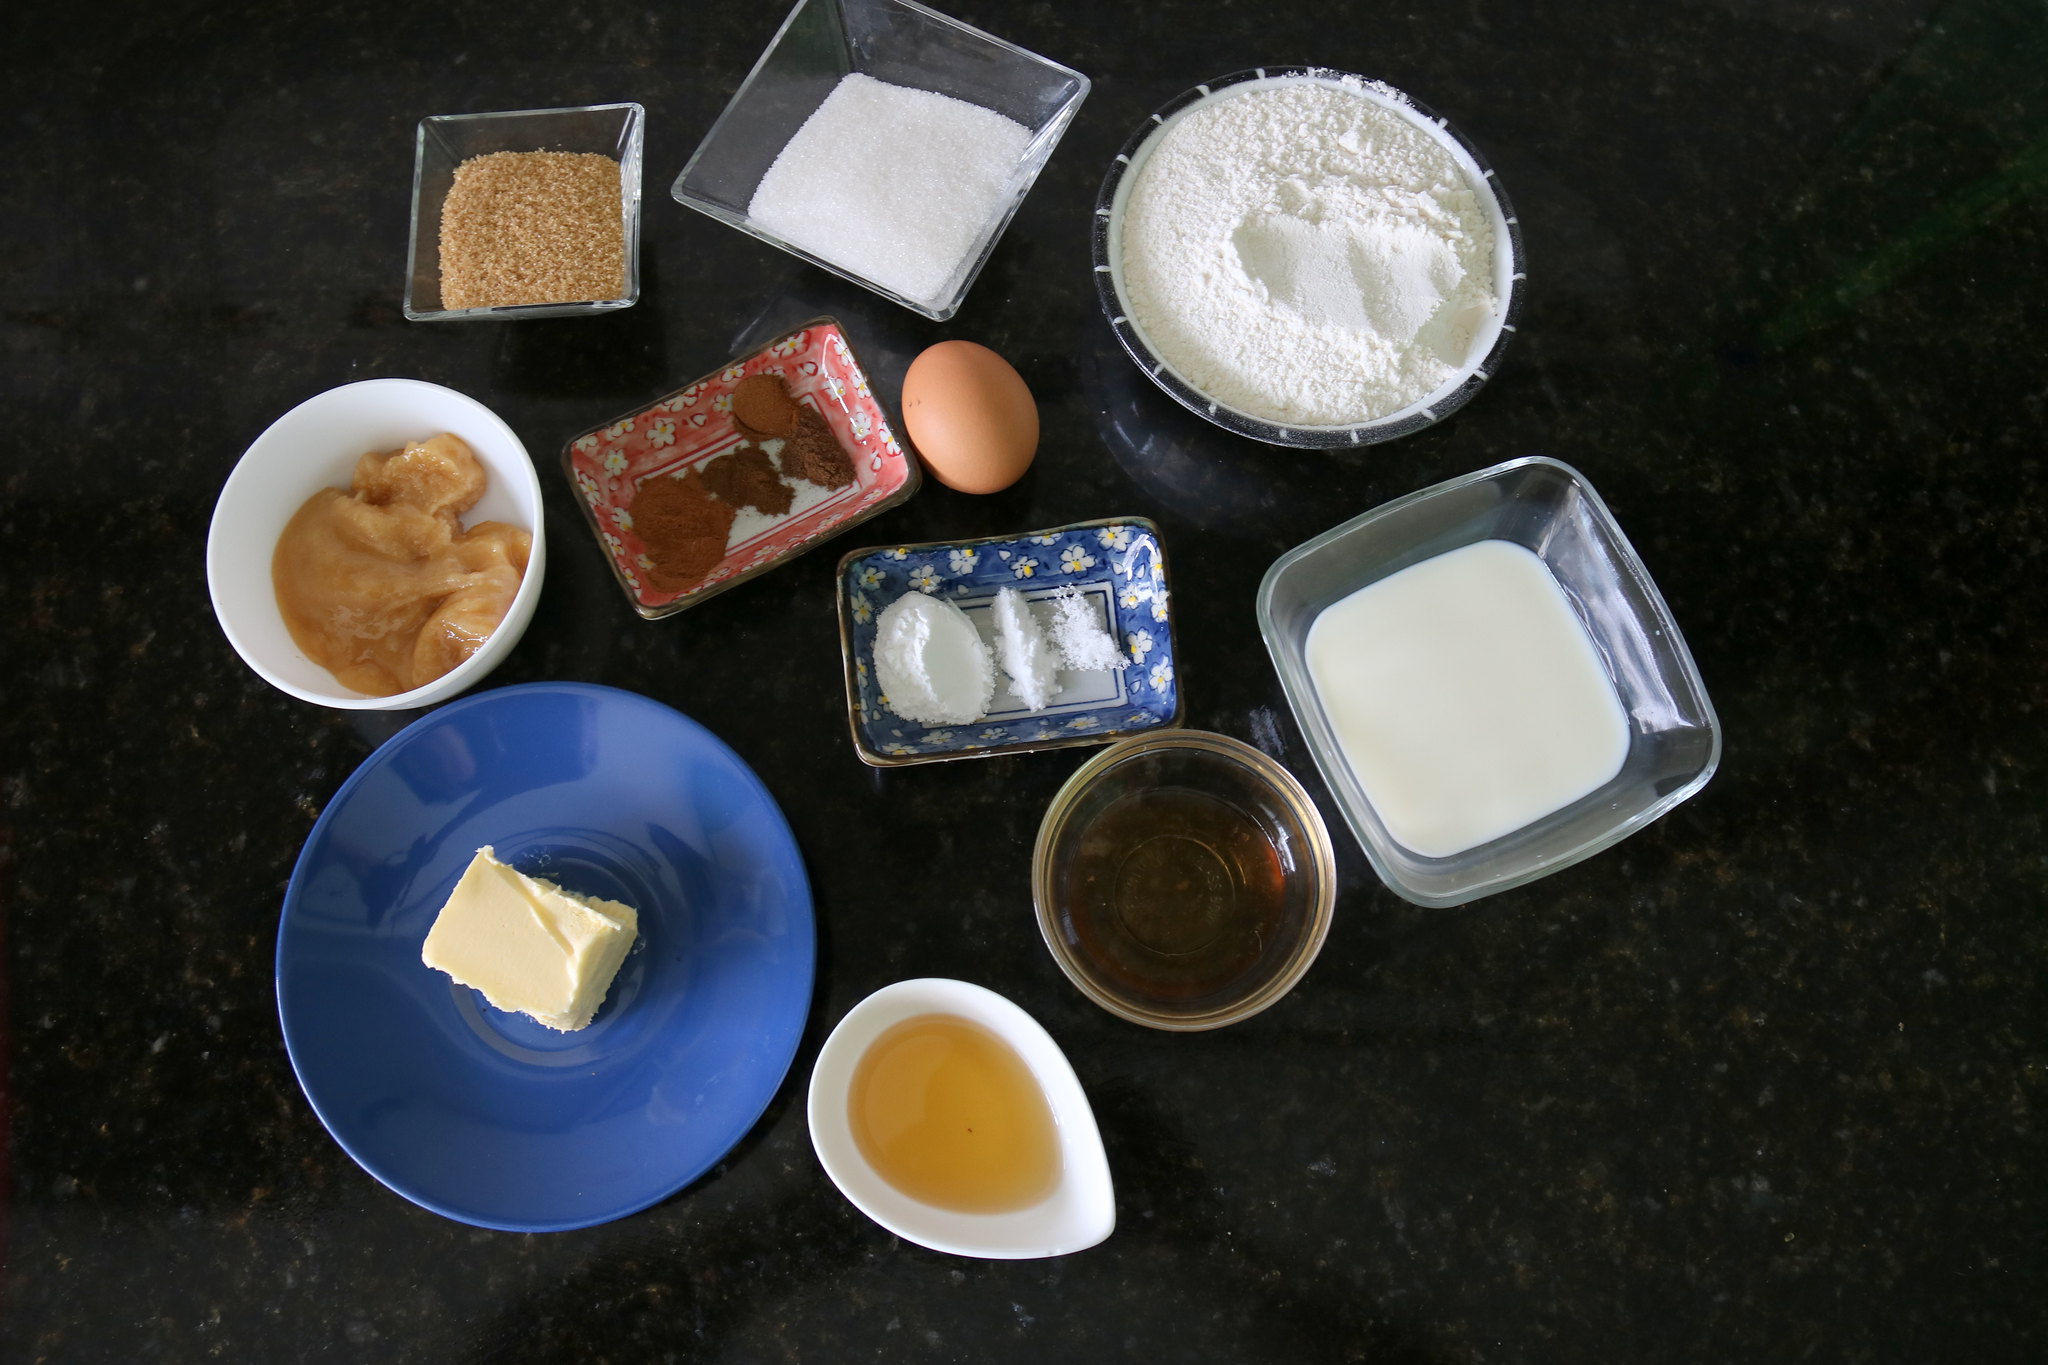
For 12 muffins, you will need:
180 g (1 ½ cup) flour
1 ¼ tsp baking poder
3 tsp of your favorite spices – I used cinnamon, nutmeg, ground cloves, allspice, and pumpkin pie spice
¼ tsp baking soda
1 pinch of salt
100 g (½ cup) sugar
44 g (¼ cup) brown sugar – as usual, if you are using measuring cups, press the sugar while measuring
120 g honey
75 g (1/3 cup) unsalted butter, melted
100 ml whole milk, room temperature
1 large egg
1 tsp vanilla extract
1 ½ Tbsp whisky – I got carried away and used about 3 Tbsp
confectioner’s sugar, to dust
The good thing about muffins is that they are super quick: why grease a tin if you can just line it with paper cups? Just remember to pre-heat the oven at 180C/350F.
In a small pan, melt the butter and let it cool.
In a big bowl that fits all ingredients, put the flour, baking powder, spices, baking soda, and salt, and whisk well, to make sure there are no lumps. Add the sugars and whisk a little bit more.
The original recipe mentioned making a well in the middle of the dry ingredients, but honestly, I just poured the honey, butter, milk, egg, vanilla, and whisky right over them! With a silicone spatula, mix the batter until just combined – don’t overwork it!
Now all that is left to do is to divide the batter evenly over the muffin cups and bake for 15-20 minutes, or until a toothpick inserted in the middle of the muffins comes out clean. Let them cool completely over a wire rack – well, let 11 of them cool completely while you eat that other one.
Dust the muffins with confectioner’s sugar, place them in a nice box, and go make someone’s day a lot better!
FREEZER: If one of your 2019 goals is to be a more organized person, one that plans ahead and all that, you can bake these muffins in November, cool completely, place them in a Ziploc bag, and freeze! In December, thaw them outside the fridge and dust with confectioner’s sugar. 😉
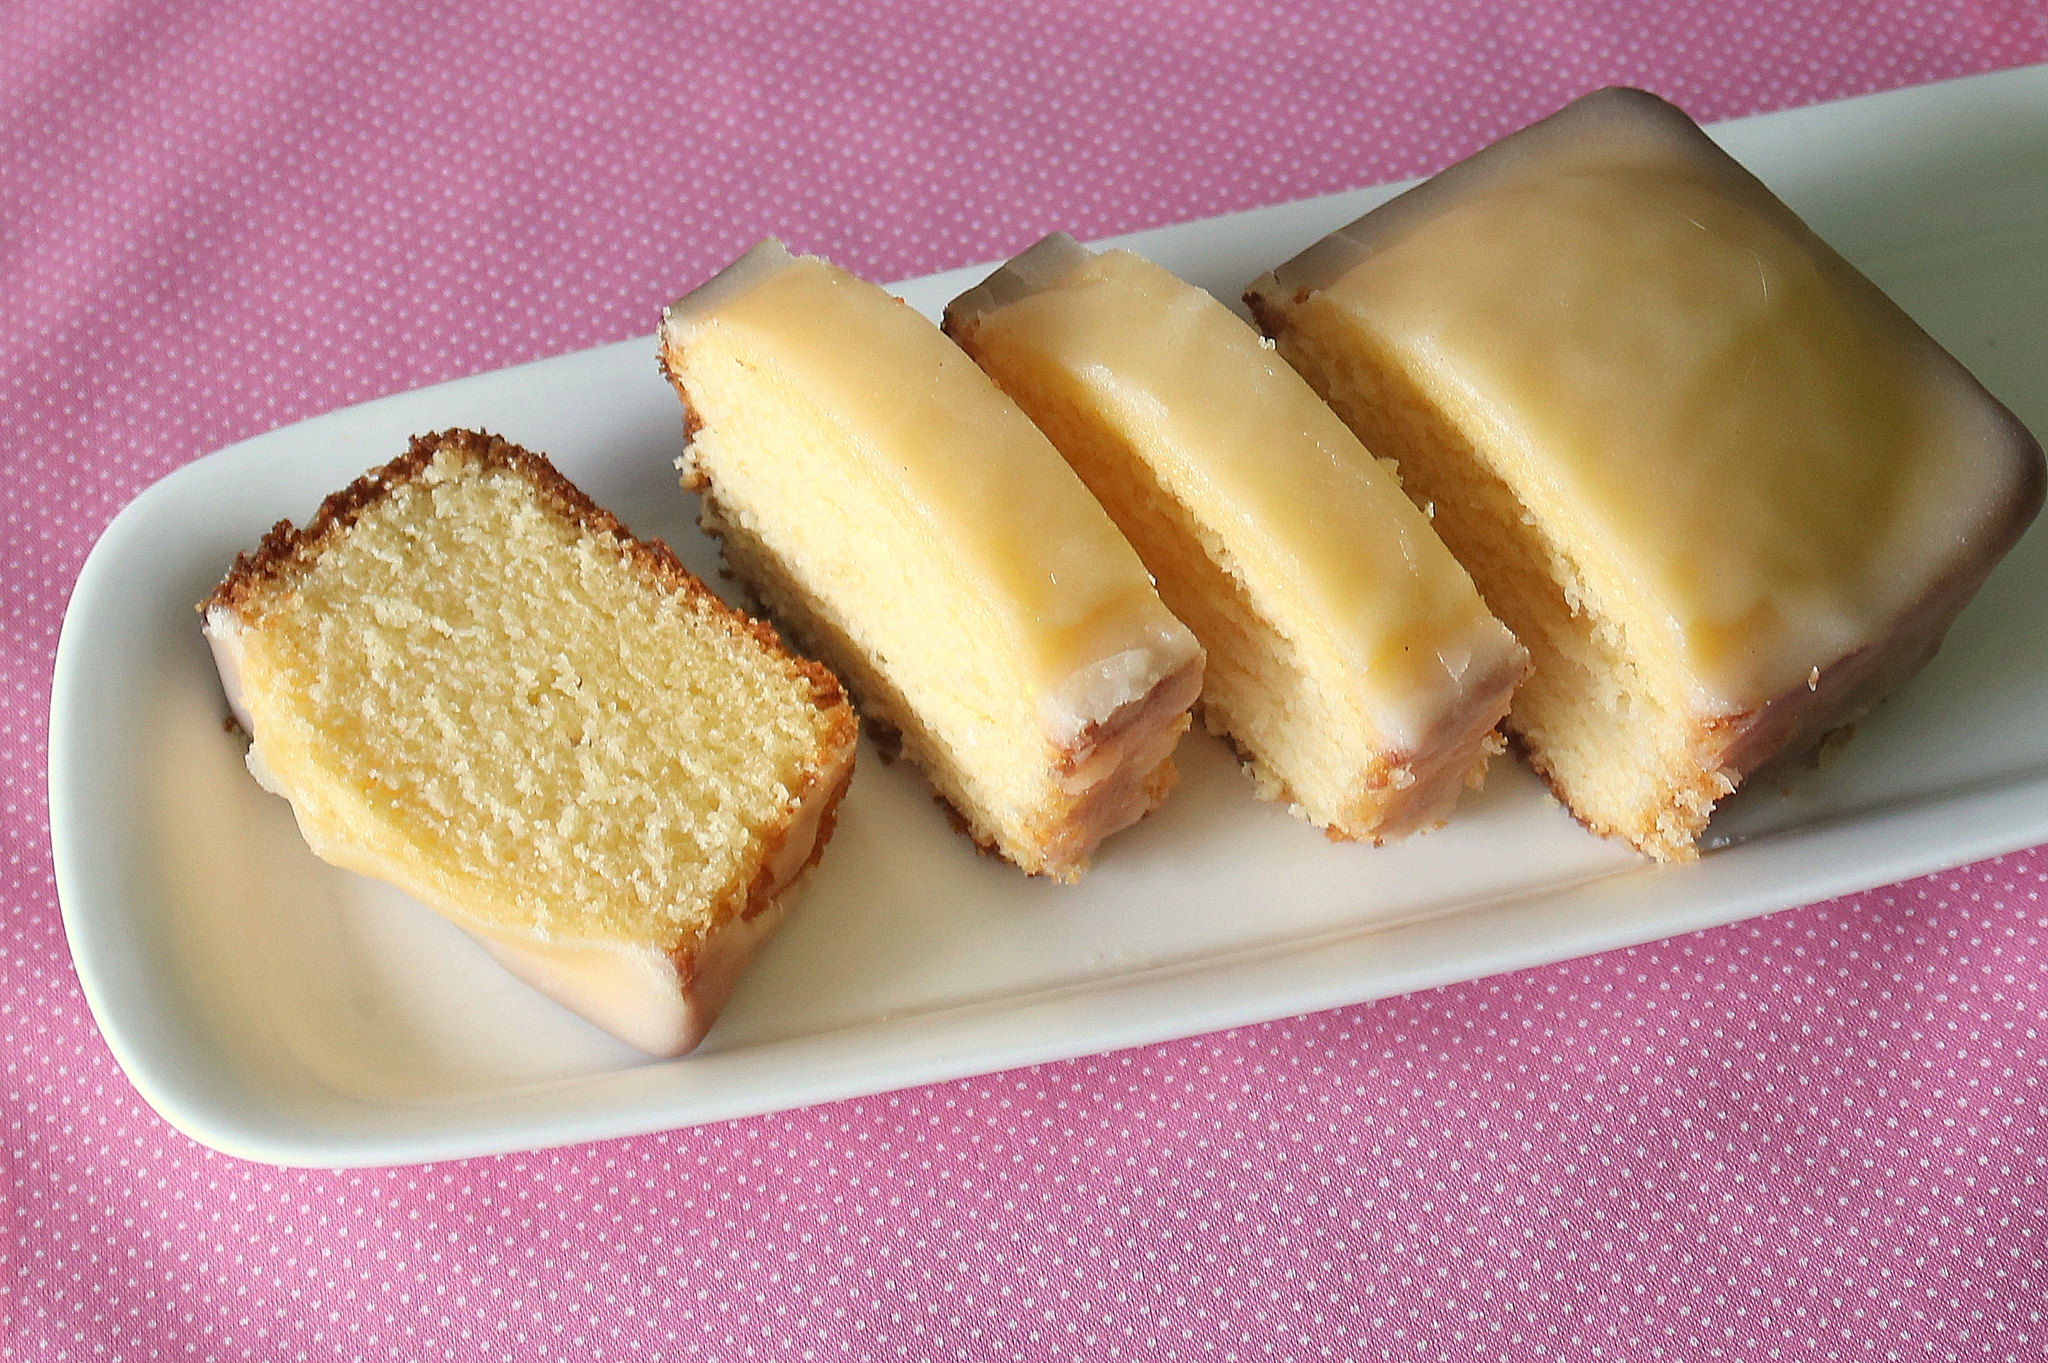
Grandma’s Passion Fruit Cake
A few weeks ago, I called Grandma to chat and ask her about her famous Salazar cake, which I had never even heard of until my aunts told me that it was amazing. Reading the recipe, I thought it was a bit too intricate for me, so I called Grandma again to tease her and decided I’d bake the cake that very weekend.
The thing is: on the following day, Mom sent me a video of Dad pretending he hadn’t eaten the last slice of cake. I asked her, and she told me Grandma had made a passion fruit cake – and she sent me a picture. Of course I went insane, absolutely determined to have that cake as well. I asked Grandma for the recipe and, unlike the Salazar cake, this was ridiculously easy!
But this raised another issue: it’s almost impossible to find passion fruit in Uruguay. But I wasn’t going to let that stop me! I found unsweetened concentrated passion fruit juice at the supermarket and decided to go for it.
Naturally, I had to go the extra mile: I made a simple confectioner’s sugar frosting to go with it – it was amazing!
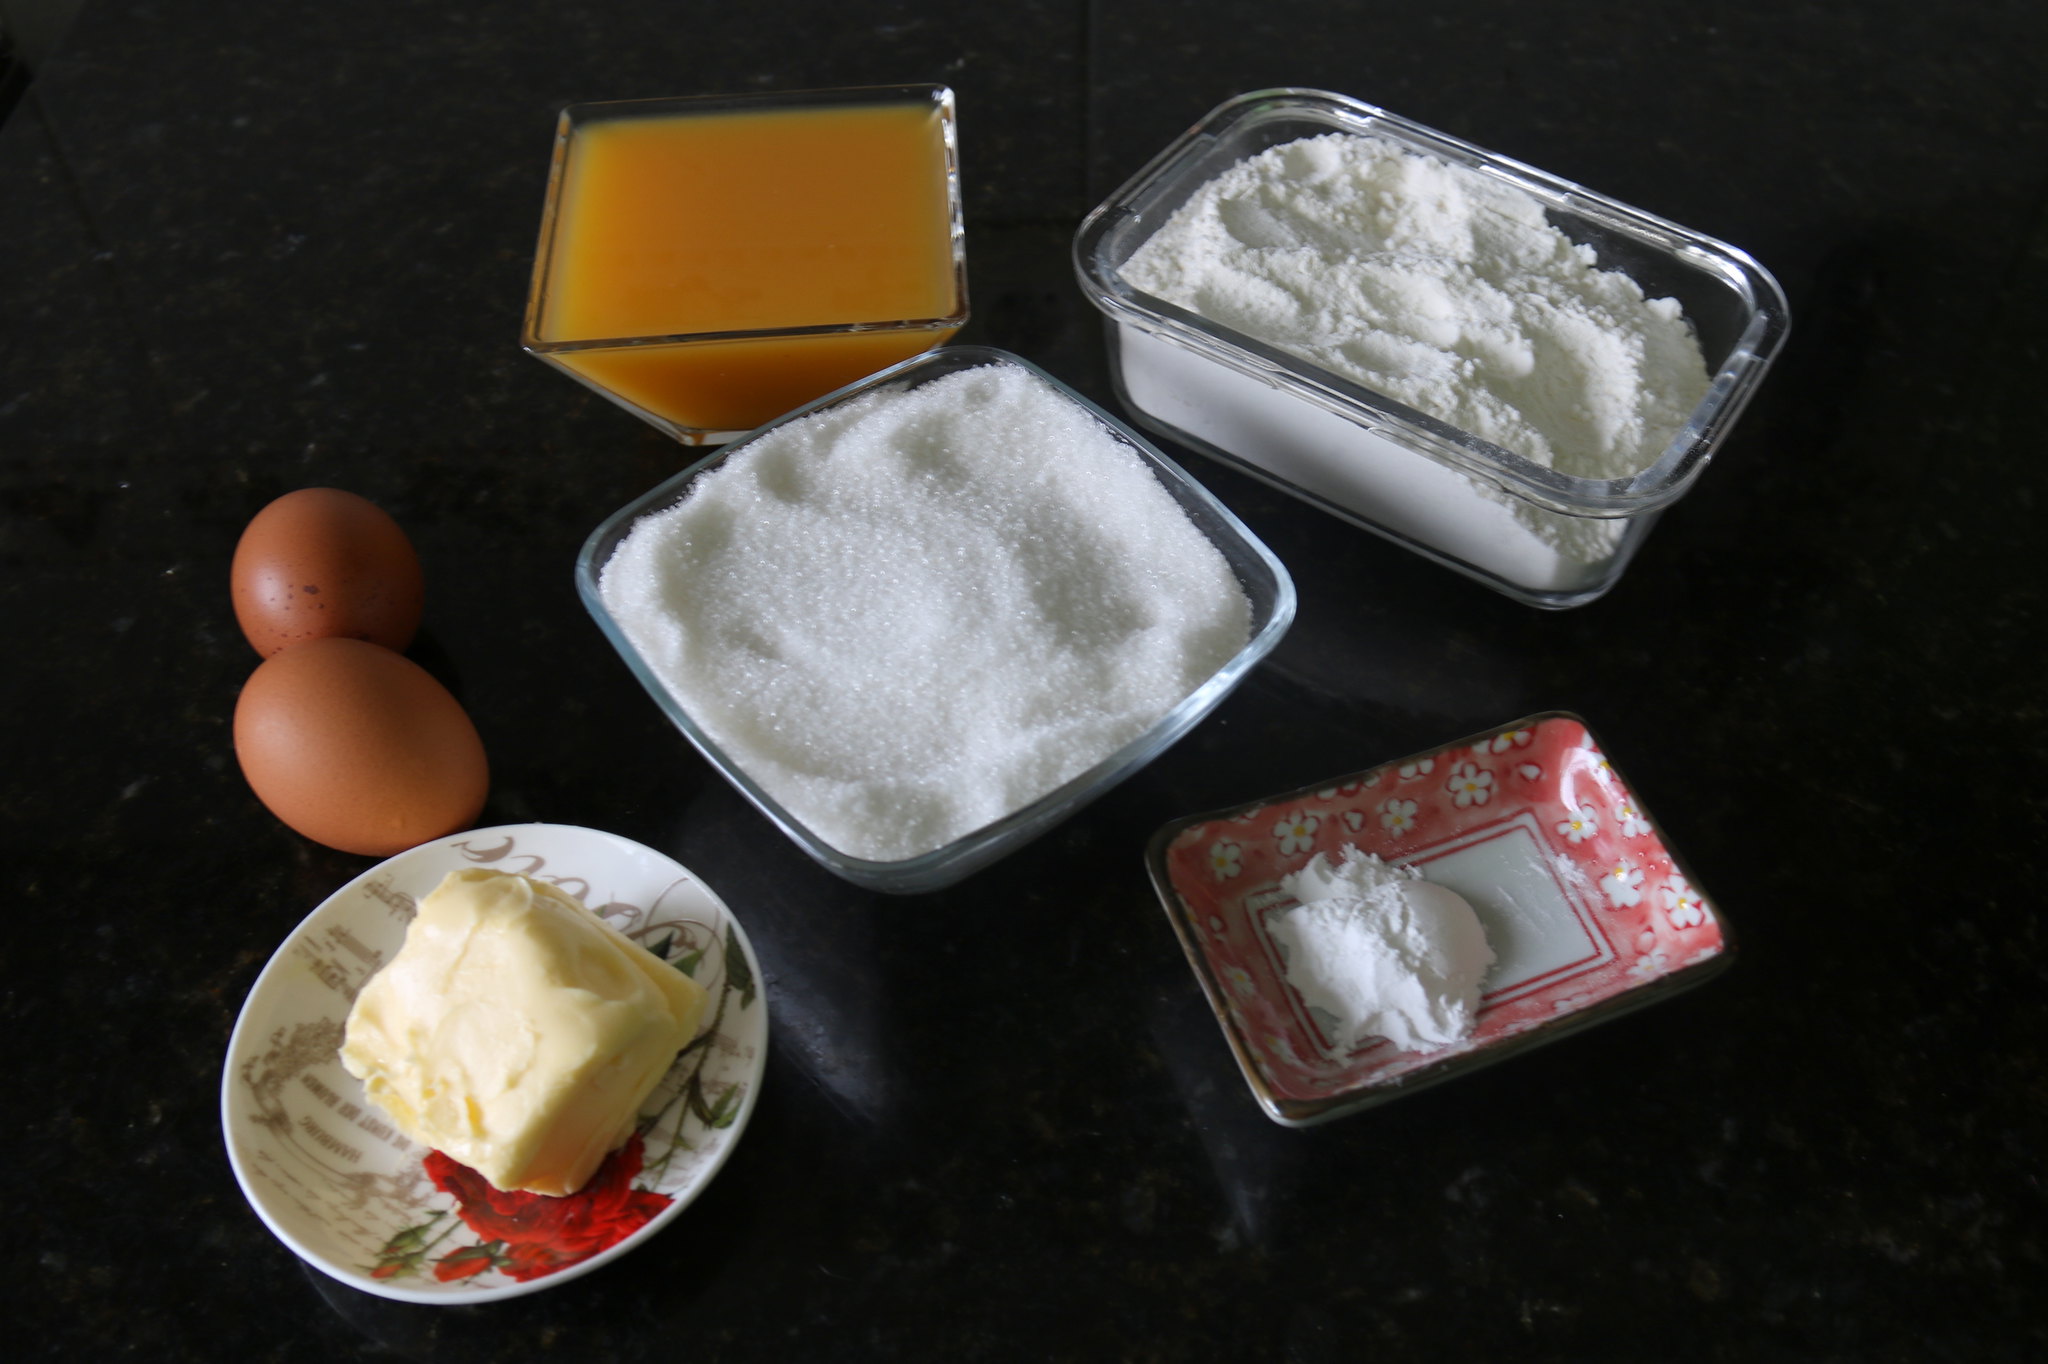
For a 9 x 5 loaf pan, you’ll need:
(Grandma absolutely disapproves, but I converted her wild home measurements into proper weight/measuring cups or spoons)
60 g (4 Tbsp) butter, at room temperature – Grandma’s recipe called for “3 heaping Tbsp”, but I’m sure she used the normal kitchen spoon, not a measuring spoon!
300 g (1 ½ cup) sugar
256 g (2 cups) flour
2 eggs
250 ml (1 cup) passion fruit juice – as all I had was concentrated juice, I used ½ cup of that with ½ cup of water
1 ½ tsp baking powder
For the frosting, which I honestly don’t think is optional, you’ll need:
(Amazing side story: Grandma later called me to ask for the frosting recipe!)
1 cup confectioner’s sugar – don’t even try to use regular sugar, Mom.
2 Tbsp passion fruit juice – again, I used 1 Tbsp concentrated juice, 1 Tbsp water.
I must confess that I was a bit concerned when I saw the amount of butter vs. the amount of sugar – maybe the recipe was wrong? I took a deep breath, thought to myself “Grandma wouldn’t have written a bad recipe in her notebook” and went for it.
As always, start by pre-heating the oven to 180 C (350 F) and greasing your baking tin.
This is a cake for the modern Grandma: it’s very quick! You know that traditional method of creaming sugar and butter, adding ingredients one by one, etc? Well, none of that is required here.
Place ALL ingredients (but the baking powder) into the bowl of your stand mixer and mix well until all ingredients are nicely incorporated. Add the baking powder, mix briefly just to incorporate it, and that’s it.
Pour the batter into your baking tin and bake for about 40 minutes, or until a toothpick inserted in the center comes out clean. Let the cake cool in the mold for a few minutes before removing it and letting it cool completely on a wire rack.
When the cake is completely cooled, make the frosting, which is the easiest thing to do: in a bowl, mix the confectioner’s sugar with the juice. That’s it. If your sugar is a bit lumpy, it’s a good idea to sift it before adding the juice, as it is less work than trying to crush those lumps later. 😀
Frost the cake and wait for about 30 minutes (it really depends on the humidity), until it’s completely dry and hardened. Meanwhile, boil some water and make yourself a fresh cup of coffee to go with that cake!
I really wanted to freeze some of the cake, to see how that frosting would take it, but I decided to call Grandma and tell her about the cake. Yes, I left the cake unguarded on the counter. When I came back to freeze, there wasn’t any cake left! 😀
Marbled Banana Chocolate Bread
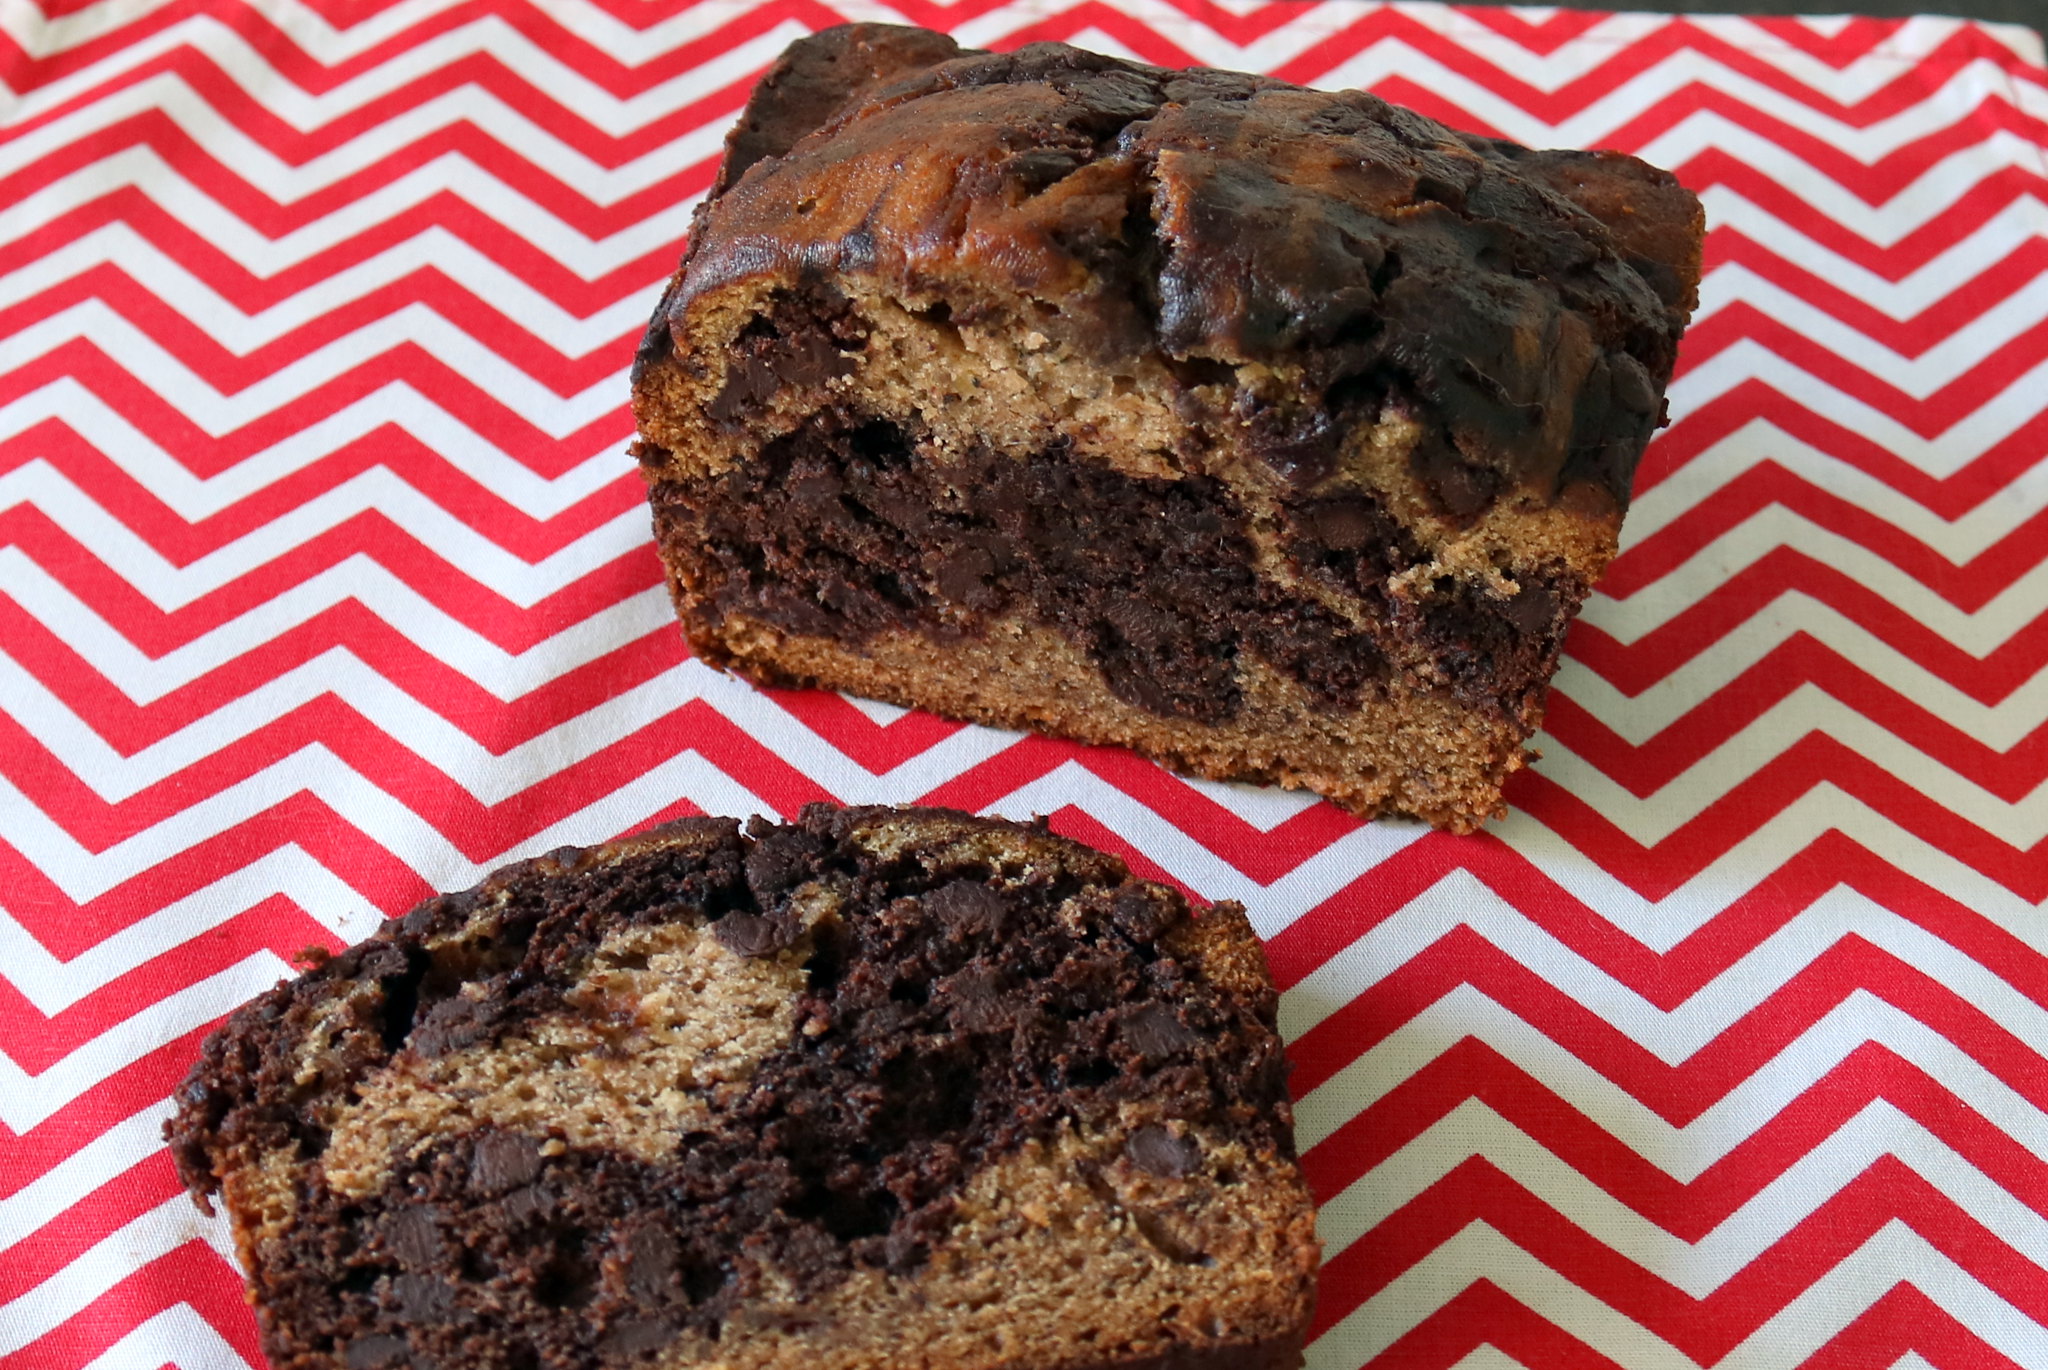
I hardly ever buy bananas here in Uruguay. When you’re used to Brazilian bananas, you don’t really care for the Ecuadorian ones, which have to be harvested much earlier than ideal to arrive here fresh.
“Hardly ever” doesn’t mean “never,” so I had bought some the other day and dumbly forgot about them! I’m still not sure how that happened, but that’s ok, because overripe banana means banana bread, one of the tastiest things you can bake!
Looking for a new take on it, I found this recipe by Deb, which seemed pretty much infallible: it’s banana and chocolate! Marbled! It was so tasty that, less than a month after the first try, I bought bananas again and let them get overripe ON PURPOSE, so I could bake this again! 🙂
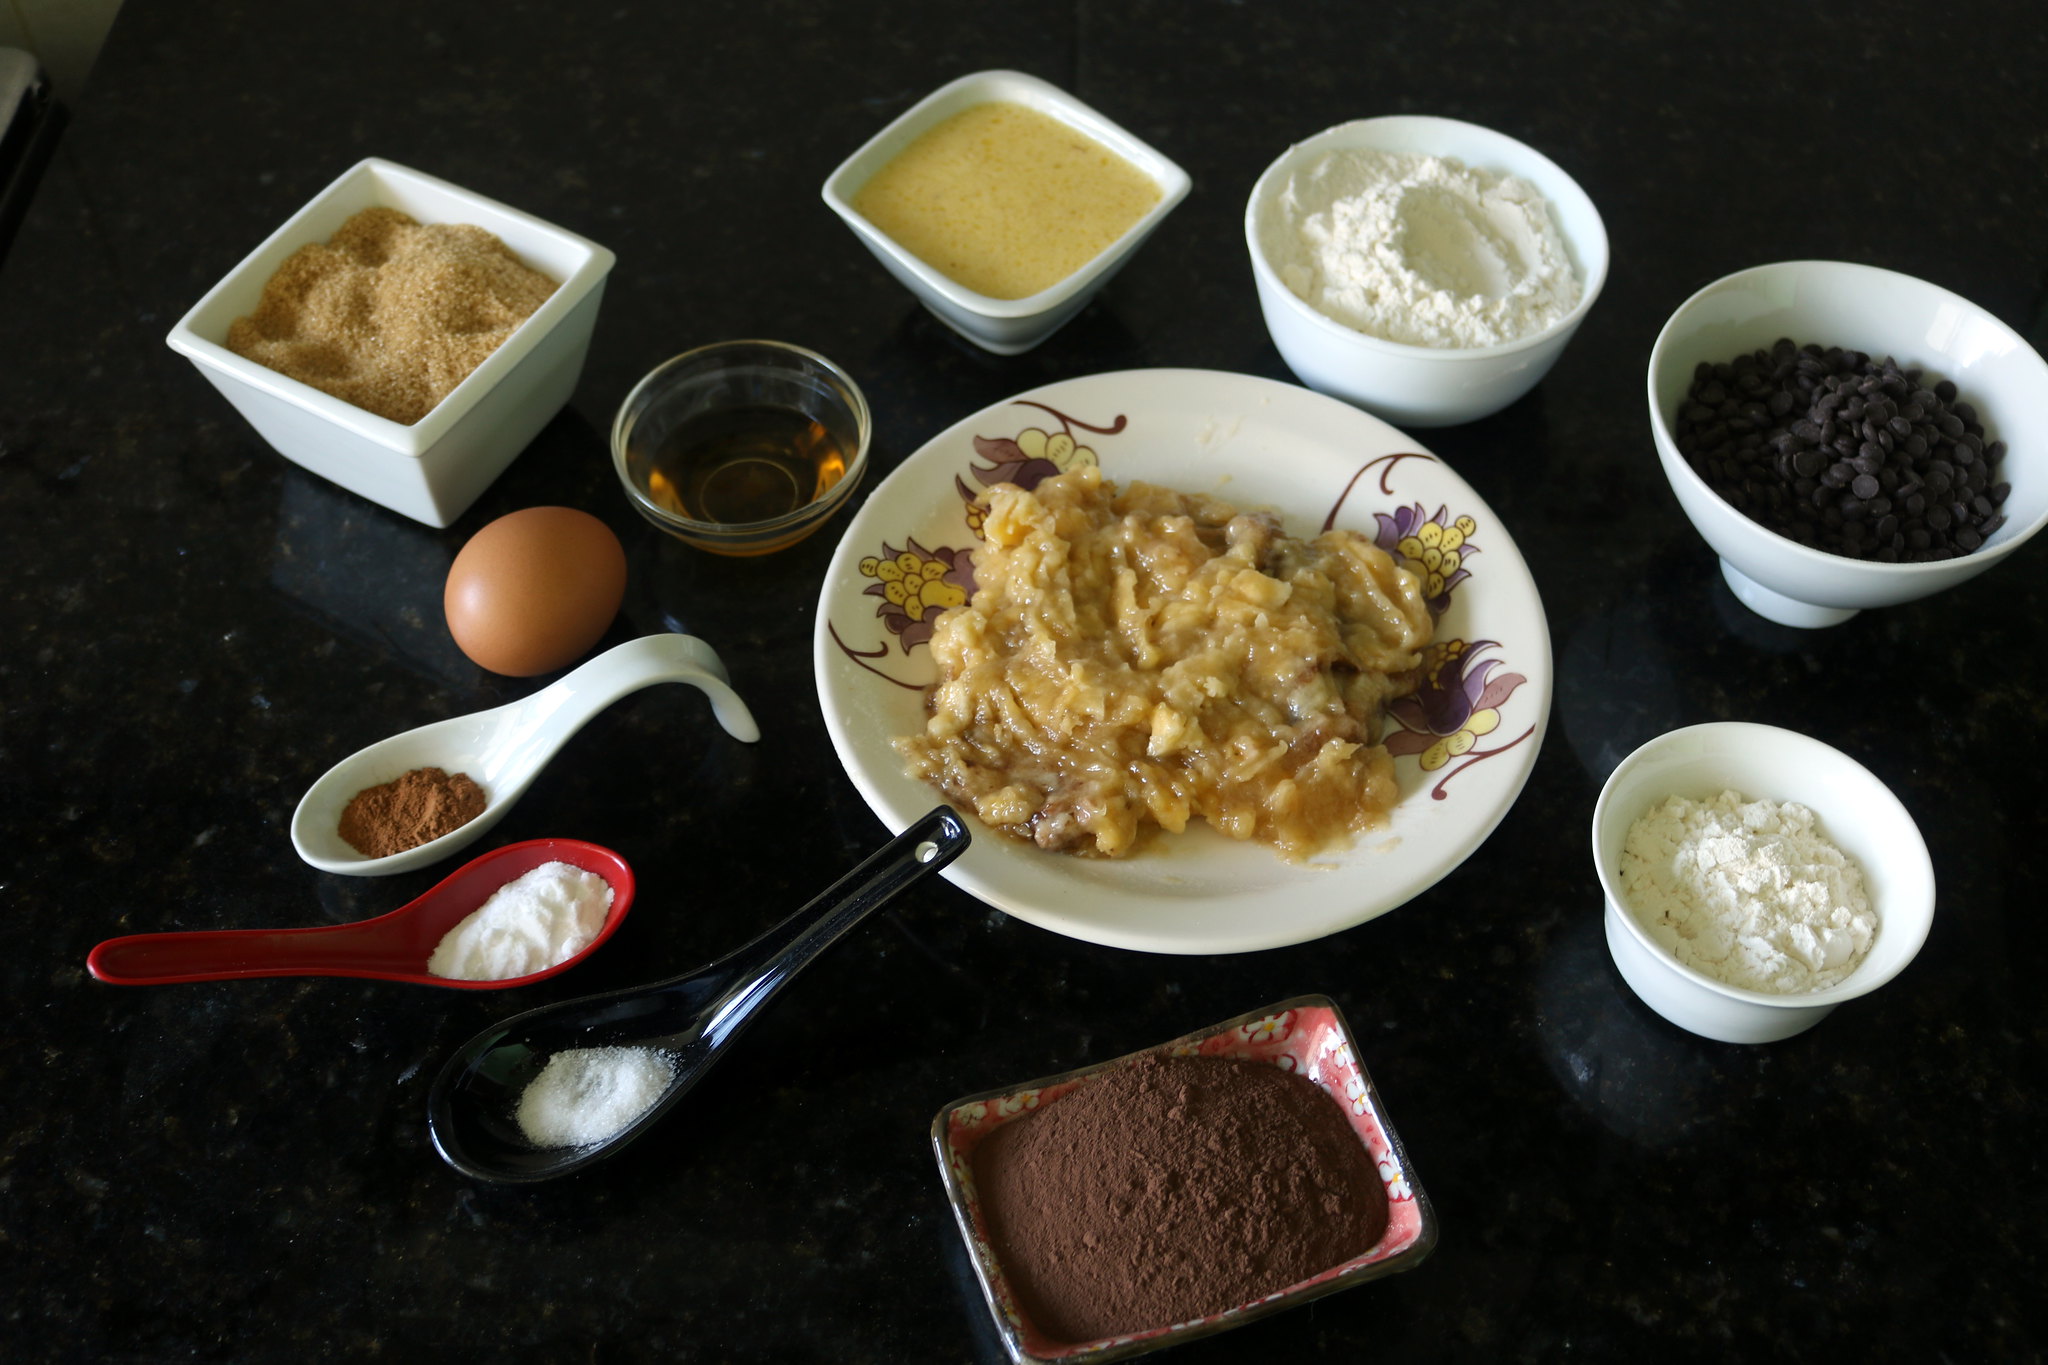
3 large and veeeeeeery ripe bananas – you know, the ones you considered tossing? Those.
115 g (1/2 cup) unsalted butter, melted – well, I only buy unsalted butter, but if all you have is salted butter, don’t worry: just don’t add salt to the batter.
145 g (3/4 cup) brown sugar
1 large egg
1 tsp vanilla extract
1 tsp baking soda
¼ tsp salt
130 g (1 cup) + 35 g (1/4 cup) flour – leave those separate, they’re used at different steps!
½ tsp ground cinnamon – you know me: I used about 1 tsp allspice instead 😀
20 g (1/4 cup) unsweetened cocoa powder
130 g (3/4 cup) chocolate chips – I used the mini chips, with 50% cocoa, but next time I’ll use a darker chocolate, chopped.
As in most cake recipes, I started by pre-heating the oven to 180 C (350 F) and greasing the pan – in this case, a 9×5 loaf pan.
In a medium-sized pan, melt the butter. In that same pan, mash the bananas very well. Add the brown sugar, egg, vanilla, baking soda, and salt, and mix thoroughly using a rubber spatula. Add 1 cup of flour, mixing until you can’t see any specks of flour.
Pour half of the batter into a bowl – I totally eyeballed it, but you can be a proper baker and weight it. To one half of the batter, add the remaining ¼ cup of flour and ground cinnamon, mixing well. To the other half, add the cocoa powder and chocolate chips.
Now it’s time to create the marble effect: place dollops of dark and white batter in the pan, as in a checkerboard. You’ll probably need to add a second layer of batter, so the top layer should be opposite the bottom: place a dollop of white batter over the dark batter, and vice-versa. Then, push a butter knife (or an offset spatula) until the bottom of the pan and drag it in a wave motion from one side of the pan to the other, just once – this way, you’ll get a marbled batter and not make it all one flavor!
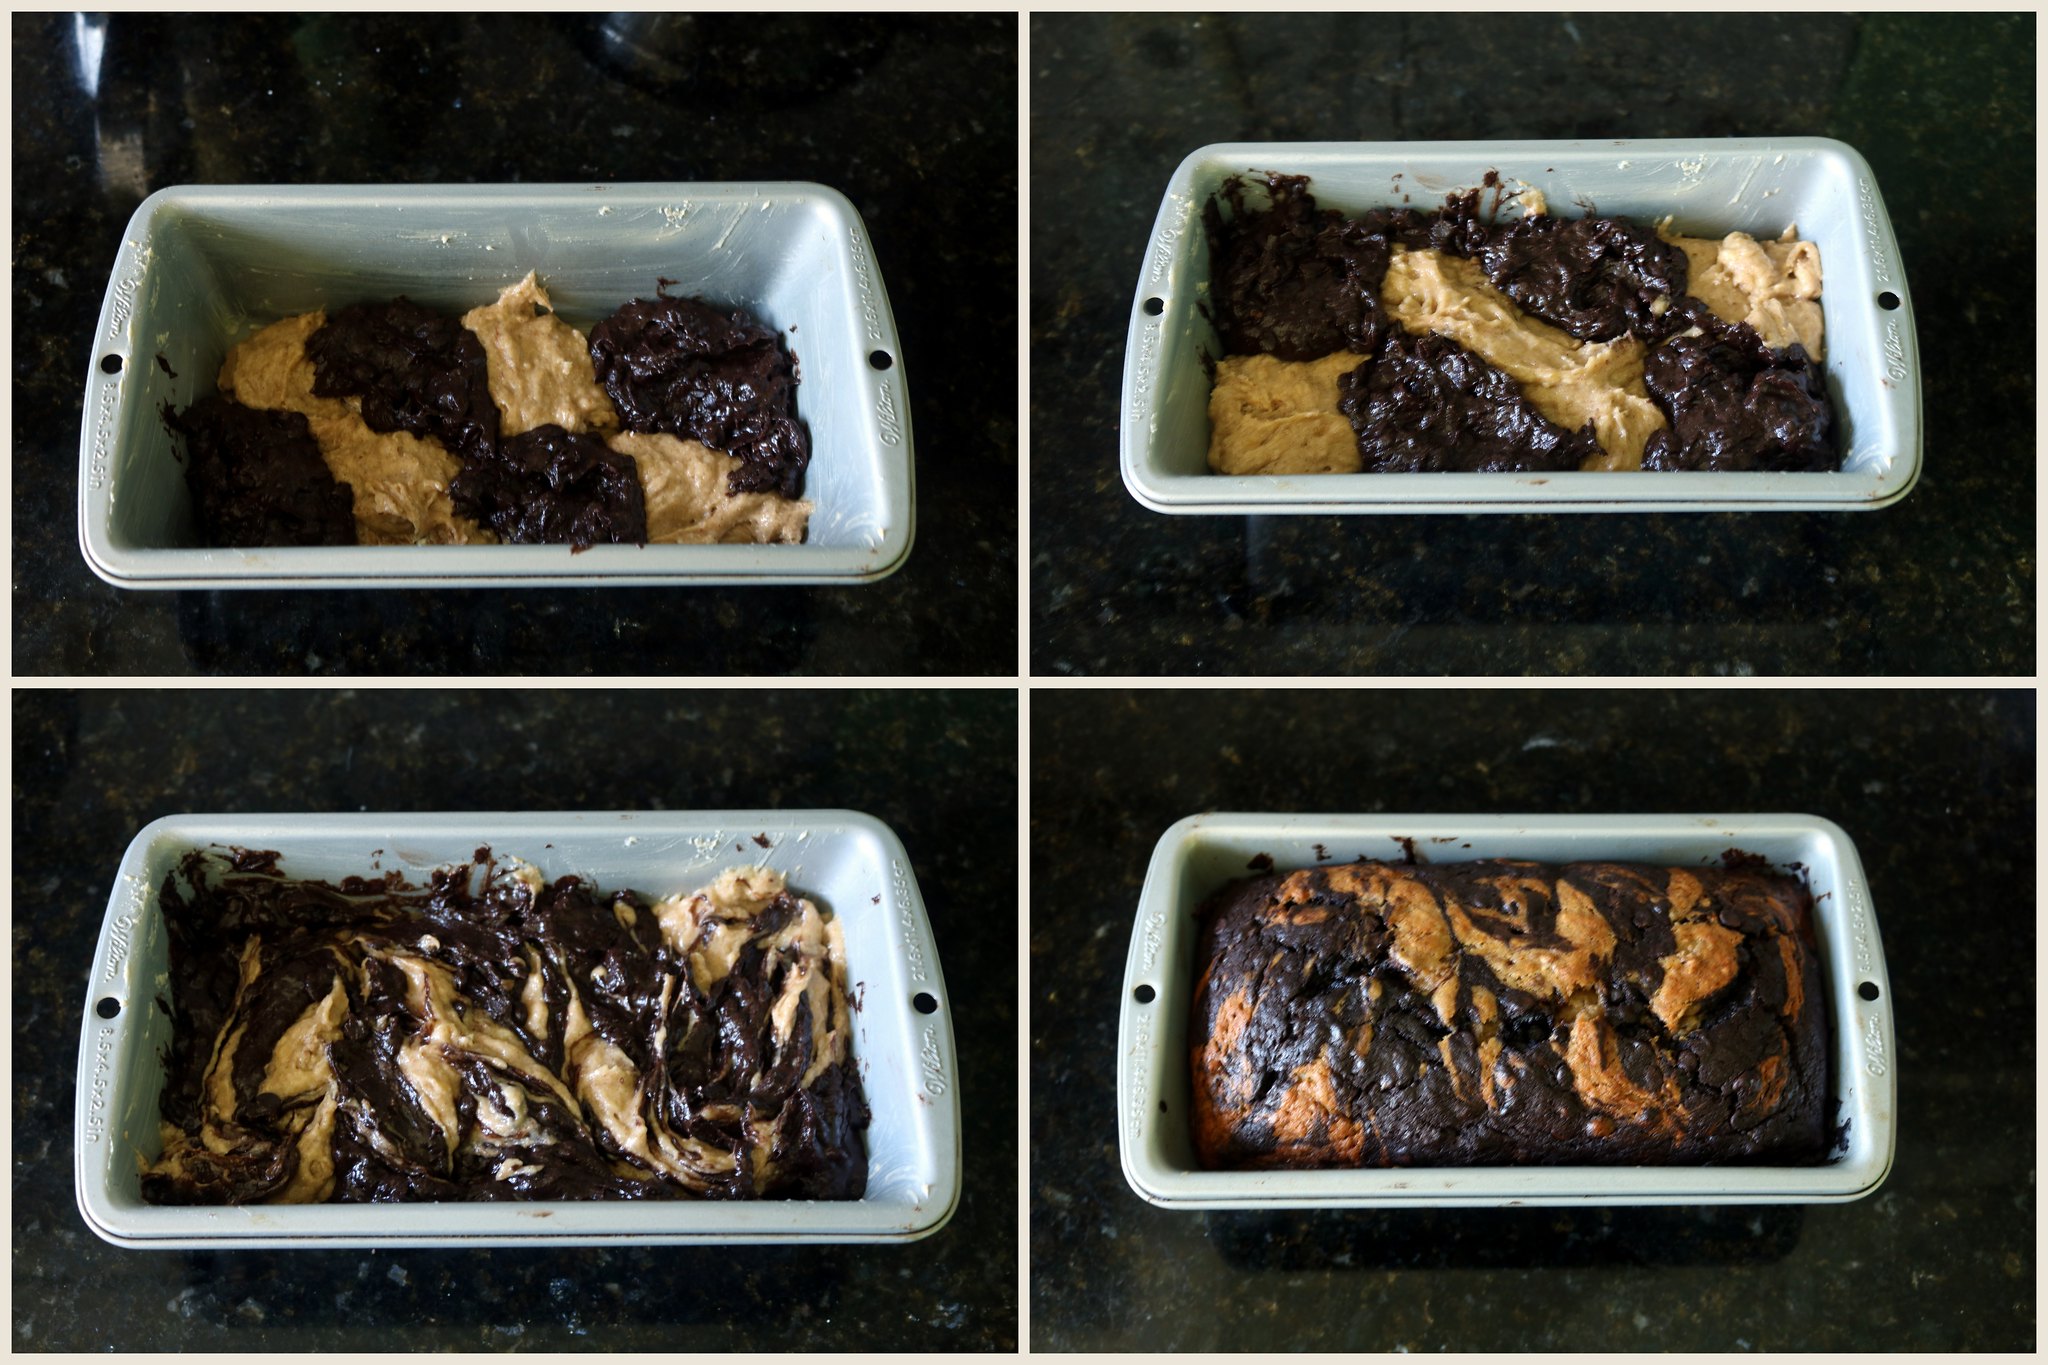
Bake for approximately one hour, or until a toothpick inserted in the middle comes out clean – be careful not to confuse melted chocolate chips for raw batter! Let it cool for about 10 minutes, then run a spatula around the pan, remove the bread from it, and let it cool over a wire rack. I like to serve it warm, but it is great at room temperature too!
FREEZER: This freezes perfectly. I usually let it cool completely before slicing it and placing in a Ziploc bag. Freeze for up to 3 months.
Coconut Lemon Lime Bars
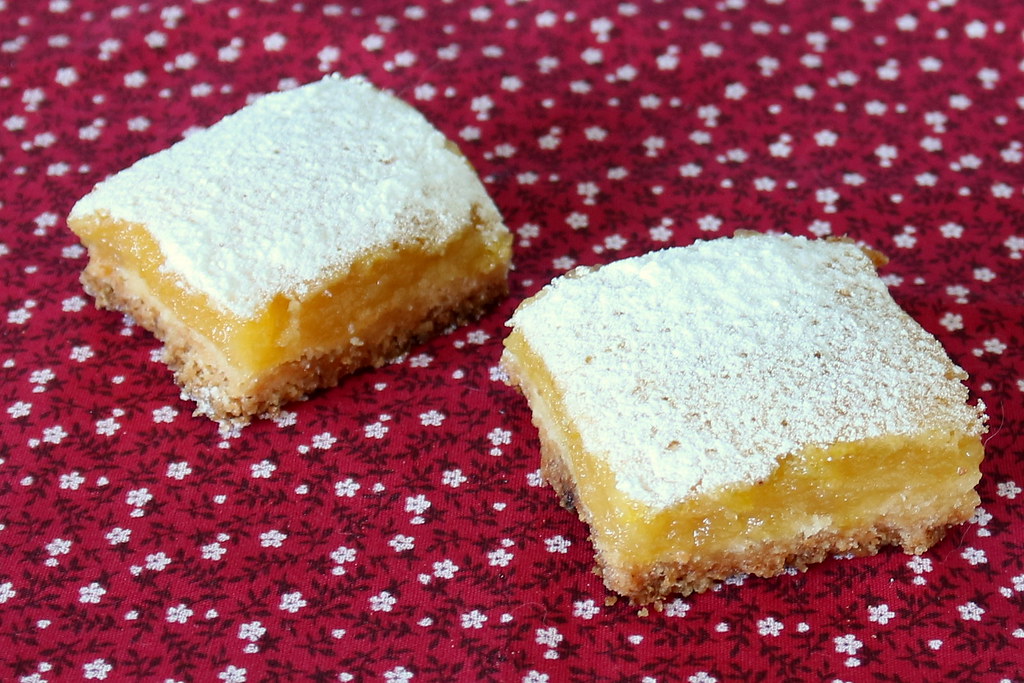
Most of our friends here in Uruguay aren’t Uruguayan – immigrants are everywhere (don’t get me started on the term “expat”). Over time, we’ve learned some pretty obvious stuff: want to please a Brazilian? Bring some brigadeiro! Want to please an American? Bring lemon bars!
Sky and I went to visit some American friends who live in Pueblo Eden – I was going to make the ones I usually made, but as I had plenty of leftover coconut from the cocadas, I decided it was time to photograph the first lemon bar recipe I had ever made. Looking at the original post, I realized I must have baked that right after Patricia posted it: the recipe is from 2011, the year I moved here!
Back then, I replaced the lime for more lemon, but this time I decided to follow the recipe (well, not really, I’m always changing something). And it was great!
For a 9 x 13 inch pan, you’ll need:
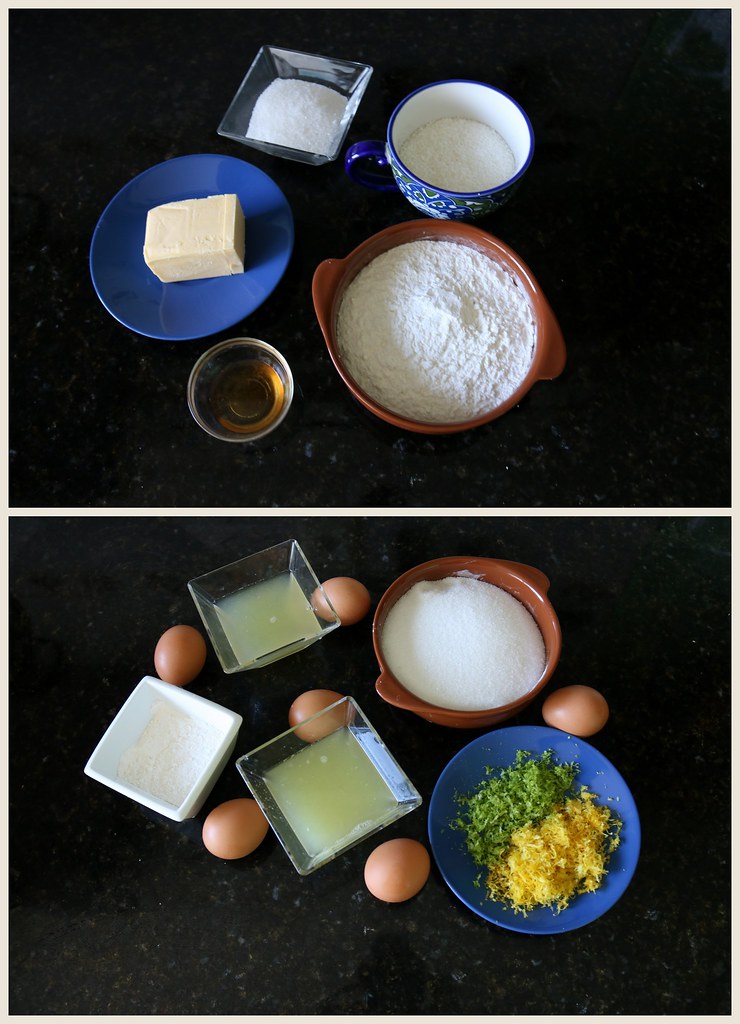
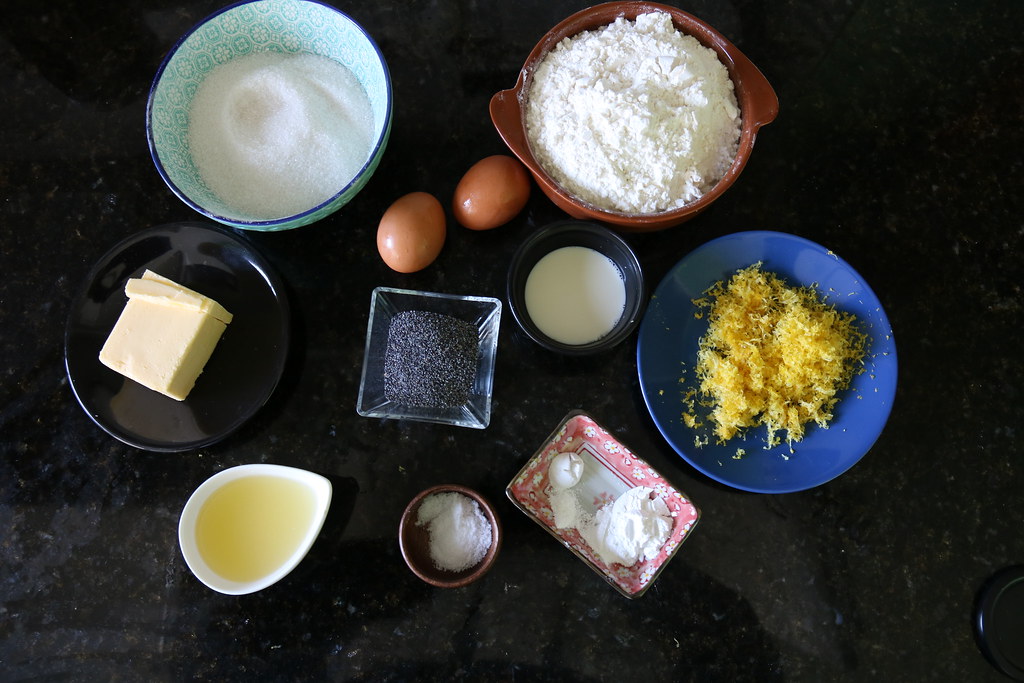
Base:
65 g (2/3 cup) sweetened coconut flakes – I can never find that ingredient here, but it’s just as well: I think they’re too sweet! I used regular shredded coconut.
185 g (1 1/3 cups) flour
90 g (1/3 cup + 2 Tbsp) sugar
1 tsp vanilla extract
127 g (½ cup + 1 Tbsp) unsalted butter, cold, and cut into cubes – You can see why a kitchen scale is a worthy investment. It’s just so much easier to measure 127 g of butter than ½ cup + 1 Tbsp!
Filling:
4 eggs
2 yolks
436 g (2 cups + 3 Tbsp) sugar – I used 350 g, but next time I’ll try with even less.
50 g (1/3 cup + ½ Tbsp) flour
zests of 2 lemons – I used the zests of 3 lemons.
zests of 1 lime – I used the zests of 3 limes, I was on a roll with that Microplane! 😀
120 ml (½ cup) freshly squeezed lemon juice
120 ml (½ cup) freshly squeezed lime juice
As most bar recipes, start by preparing the pan: butter a 9 x 13 inch pan and cover it with aluminum foil, leaving a “handle” to help remove the bars from the pan. Butter the aluminum foil WELL, being careful not to tear it. This is also the perfect time to start pre-heating your oven.
Prepare the base: if you’re using coconut flakes, place them in the food processor and pulse to grind them some. Add all dry ingredients, pulse, add the butter and vanilla, and process until a dough forms. You can also do this by hand: whisk the dry ingredients, add the cold butter cubes and the vanilla, and use your fingertips to “crush” the butter into the dough.
Press the dough on the prepared pan and bake for 20-25 minutes, or until it turns slightly golden on the sides.
Meanwhile, prepare the filling: zest the lemons and limes, being careful not to cut into the white (and bitter) part. Juice them – I needed 5 limes to get 120 ml of juice, but that always varies!
In a bowl, whisk the eggs and yolk to combine. Add the remaining ingredients, whisk well, and set aside.
When the base is slightly golden on the sides, remove it from the oven, pour in the filling, and carefully place it back in the oven. Bake for another 25-30 minutes, or until the filling is set.
Remove from the oven and let it cool completely before placing them in the fridge for at least 2 hours. As I was running late, I placed them in the freezer for 1 hour and it totally worked! 😛
So they look a bit prettier, dust them with confectioner’s sugar. Try your best not to eat them all at once, as Sky tried to! 😀
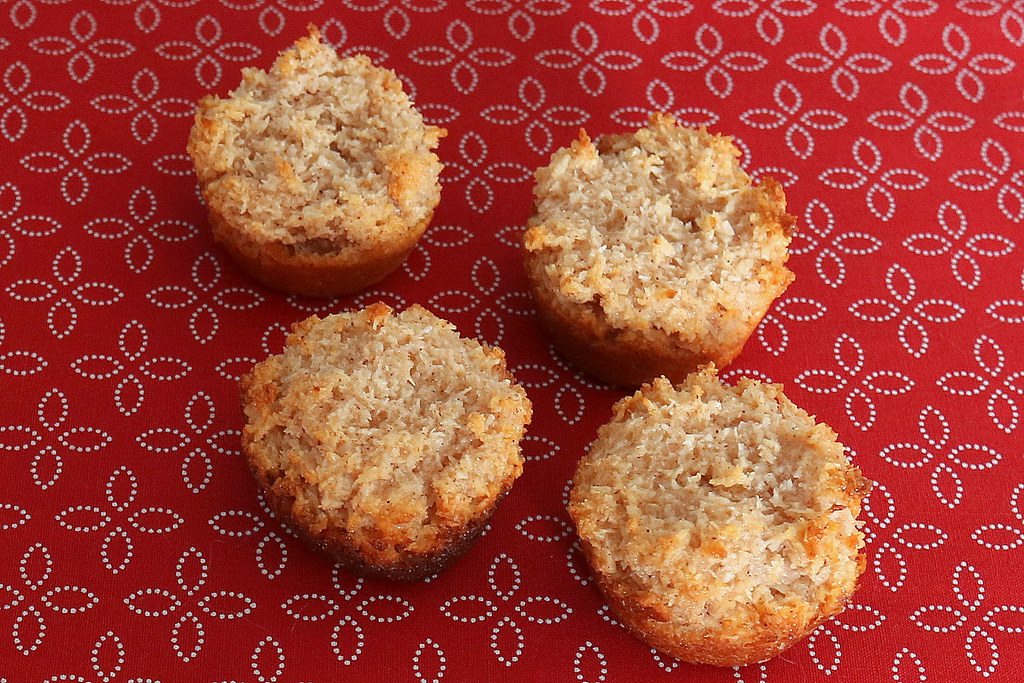
Mexican Cocadas
In our group of friends, we are creating a new tradition of themed parties – we had a Russian night and, the Saturday before the last, it was our turn to host a Mexican night. We decided to serve guacamole and chips for starters and a burrito bar for the main course, but I was not sure what to do for dessert. I didn’t want to bake anything too heavy, such as a tres leches cake, nor anything too boring, such as a flan. I decided on lemon bars.
While the bars were baking, I kept researching Mexican dessert recipes and came across a clip from a daytime Mexican TV show (so you can imagine it was a bit… trashy?). But they were teaching how to make this coconut treat that was very different from the Brazilian version I am used to, so I decided to give it a go!
I used a minimuffin tin because I wanted bite-sized treats. I tried one as soon as they came out of the oven and immediately decided to make a second batch, as it was delicious! This was a great idea: the cocadas vanished from the dessert table!
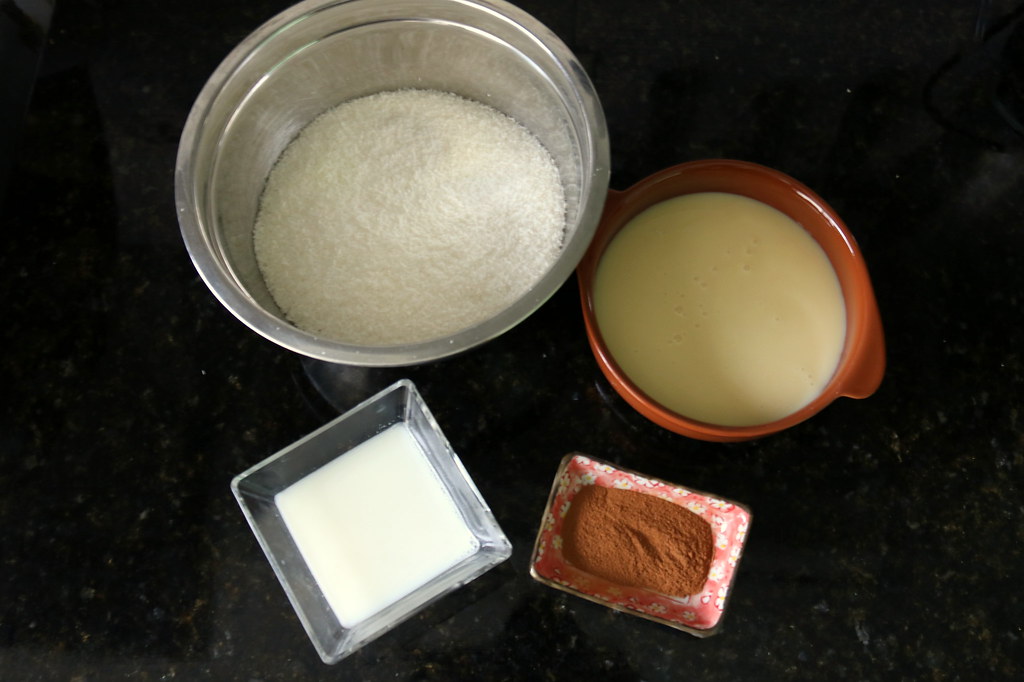
For 24 mini cocadas (in the video, they used a normal 12-cup muffin tin), you’ll need:
1 can (395 g) sweetened condensed milk
100 ml whole milk
1 Tbsp cinnamon – yeah, I know it sounds like a lot!
3 cups (300 g) desiccated shredded coconut (unsweetened)
This recipe is extremely easy. The hardest part is greasing the minimuffin tin! Mine claims to be non-stick, but I greased it anyway. This is also the right time to pre-heat your oven to 180 C/350 F.
In a small pan, boil the sweetened condensed milk with the whole milk and the cinnamon. Place the coconut into a big bowl. Pour the boiling milk mix over the coconut and mix well with a silicone spatula.
Divide the mixture evenly among the cups – if you are using a minimuffin tin, you can fill them up! Press the mix into the wells, just to flatten the surface a little bit, and bake for about 20 minutes, or until the edges are golden-brown.
Let them cool in the tin for about 5 minutes, then use a spatula to remove them and let them cool over a wire rack. Or eat them right away, life is too short for cooling times anyway! 😀
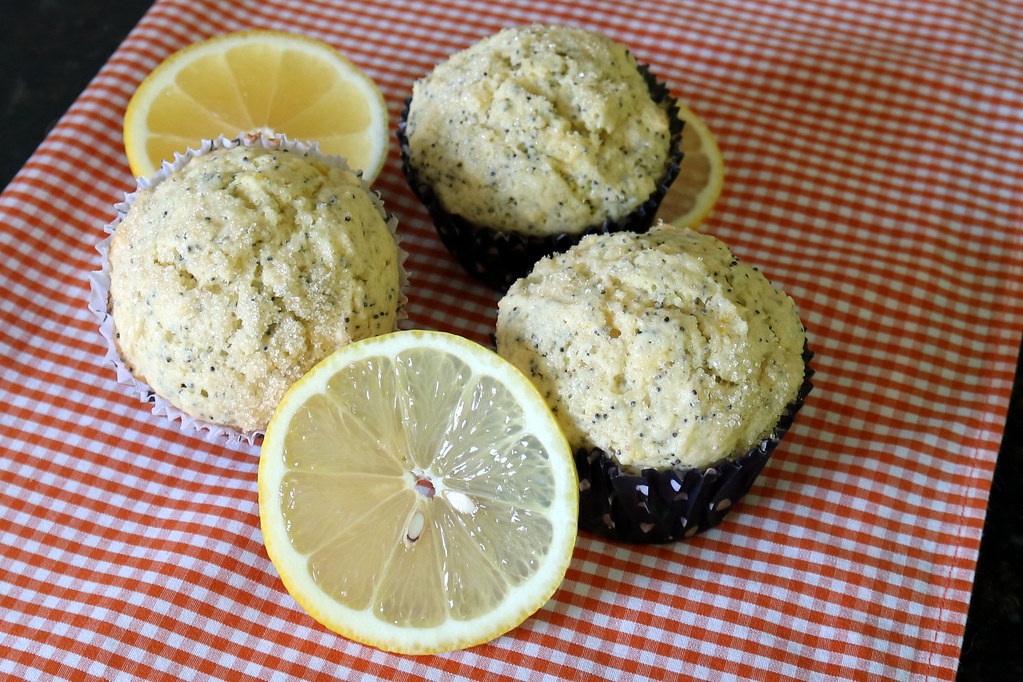
Lemon Poppy Seed Muffins
A few months ago, I was at the supermarket browsing the spice section when I noticed a new jar: “semillas de amapola”. I had to suppress a shriek: after seven years, I had finally found poppy seeds here! I bought it and came back home thinking about all the recipes I’d make with it, in that excitement of those who really like to cook.
Unsurprisingly, I arrived home, put away the jar and FORGOT about it. I completely forgot I had bought it, forgot about all the recipes I had pinned in the ten-minute drive from the store to my apartment… I simply forgot. Until last week, when I realized I was hungry for something sweet.
I opened the pantry, looking for some chocolate, and I saw the poppy seeds. I took that as a sign of the universe to procrastinate, I mean, to bake Martha’s muffins! 😀
For 12 muffins, you’ll need:
113 g butter
2 ½ cups flour
1 ¾ tsp baking powder
¼ tsp baking soda
1 tsp salt
1 cup sugar
2 large eggs – I used 3 small ones, as that’s what I had
zests of four lemons
¼ cup lemon juice – I added 2 Tbsp, because why not?
¼ cup milk
3 Tbsp poppy seeds – I used only 2, as it looked like way too much when I was adding it to the batter
1 Tbsp sugar, for dusting – I used demerara sugar, because I swear the package was staring at me… 😀
Except for the panettone ones, muffins are usually a fuss-free recipe, which is great. Start by pre-heating the oven and placing the paper liners on a 12-cup muffin tin.
In a small saucepan, melt the butter – I won’t judge you if you use the microwave!
In a large bowl, whisk the flour, salt, baking soda, and baking poder. In another bowl, whisk the sugar, milk, lemon juice and zest, and the eggs. When the butter is cold, whisk that in!
Now comes the hardest part of the recipe: dig through that messy drawer and find your silicone spatula. Pour the liquids into the flour mix. Stir with the spatula just until you can’t see any white specks of flour – this will actually happen quite fast. This is not a cake, so don’t overmix it!
Add the poppy seeds and stir to combine. Divide the bater into the 12 cups and sprinkle the demerara sugar. Bake for approximately 20 minutes, or until a toothpick comes out clean – conveniently enough, 20 minutes is exactly the time you need to do the dishes and make some coffee to drink while eating the muffins!
Technically, you’re supposed to cool them over a wire rack, but we both know that is not going to happen! 😀
Freezer: When they are completely cool, place the muffins in a ziploc bag and freeze for up to three months.
Lemon White Chocolate Coconut Cookies

White chocolate is one of those things that I only learned to enjoy as a grown-up. The first step was not thinking about it as chocolate (because then dark chocolate wins!), but as a tasty treat! Unfortunately, a lot of brands have hydrogenated fat, which makes them quite icky. One of these days, I bought a fancy Belgian one and I kept thinking how great it was! It was time to look for some recipes, such as this one from The Baker Chick.
Despite the white chocolate, these cookies aren’t overly sweet. Together with a fresh cup of coffee, these were a hit!
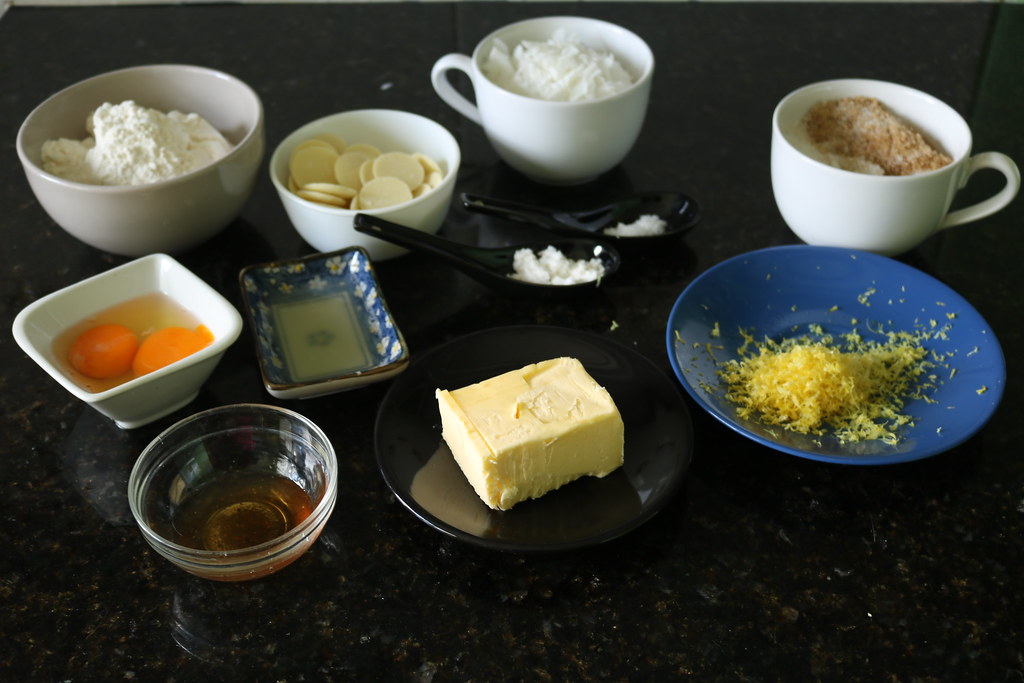
1 ½ cups sweetened coconut flakes – I used unsweetened coconut flakes and I thought the cookies were sweet enough!
1 ¾ cups flour
½ tsp baking soda
¼ tsp salt
113 g unsalted butter, room temperature
½ cup brown sugar – press the sugar when measuring
½ cup white sugar
1 egg and 1 egg yolk
1 tsp vanilla extract
Zest of 1 lemon
2 tsp lemon juice
113 g white chocolate, chopped
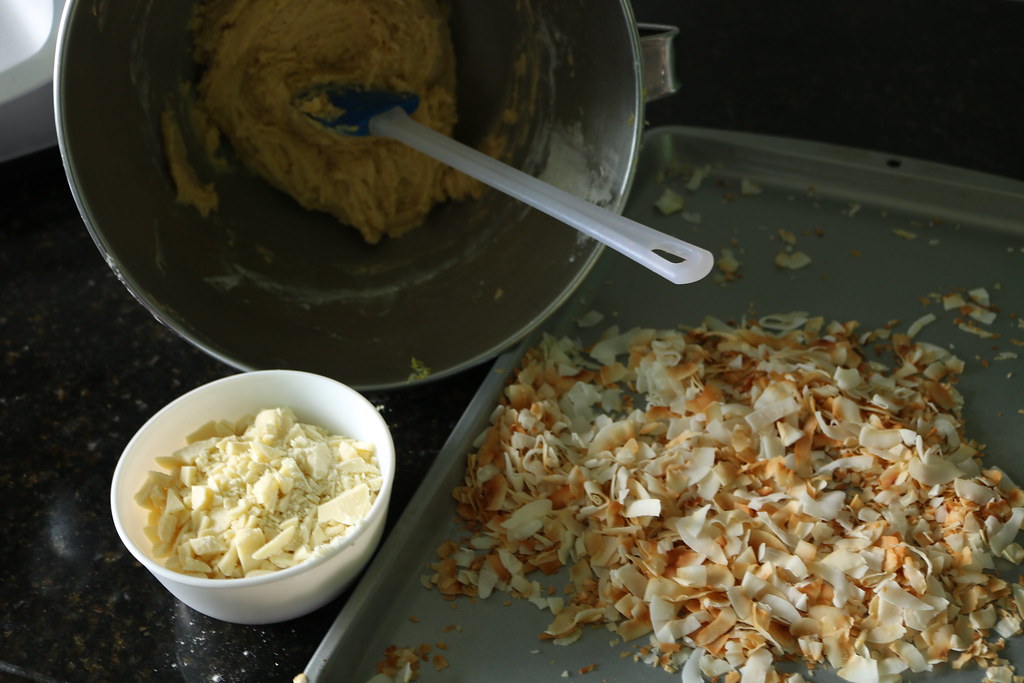
Spread the coconut flakes on a baking sheet and toast in a pre-heated oven for 5 to 10 minutes, stirring well every 2 minutes, until the coconut is golden. Set aside the coconut, but don’t turn off the oven.
Cover the cookie sheets with parchment paper – I used a Silpat.
In a small bowl, whisk together the flour, baking soda, and salt. In the bowl of your stand mixer, place the butter, brown sugar, and white sugar, and mix until they are well combined. In cookie recipes, I try to avoid over-beating the butter. Add the egg, egg yolk, vanilla, and lemon zest and juice, and combine the ingredients using a silicone spatula.
Add the dry ingredients, mixing until you can’t see any flour specks anymore. Finally, add white chocolate and the toasted coconut, and mix well with the spatula.
Use a cookie scoop to portion the dough, or simply make small balls of dough (1 Tbsp). Place them in the cookie sheets, leaving about one inch between them – they spread a little bit in the oven.
Bake for 10-12 minutes, or until the edges are slightly golden. Carefully remove them from the cookie sheet – they will be kind of soft! – and let them cool completely on a cooling rack.
Tip: If you’re using the same baking sheet to bake multiple batches, cool it before adding the second batch, so that the cookies won’t spread too much in the oven. I usually remove the baked cookies (and the parchment paper, obviously) and place the sheet under running tap water for a few seconds, until it’s cool enough for me to touch it with my bare hands. Then, I dry it with a cloth and it’s ready for the second batch!
Freezer: If you don’t want to bake the entire batch on the same day, flash-freeze the dough balls on a tray. When they are completely frozen, transfer them to a Ziploc bag – they’ll last up to three months in the freezer. To bake, place the frozen balls on the prepared baking sheet and bake for a few extra minutes! It’s that easy!
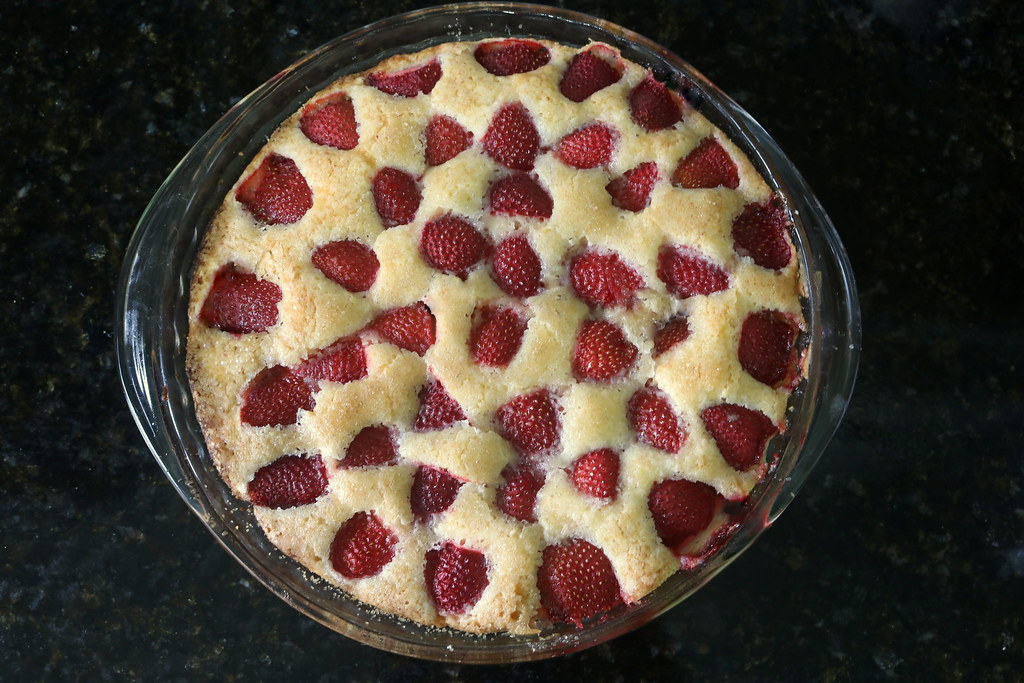
Strawberry Cake
For Easter, I decided to unleash my inner hipster and make a chocolate-FREE dessert! The strawberries at the supermarket looked inviting, so I decided to bake this cake that I had seen made by Paula from The Cookie Shop and Deb from Smitten Kitchen, all based on Martha Stewart’s recipe! 😀
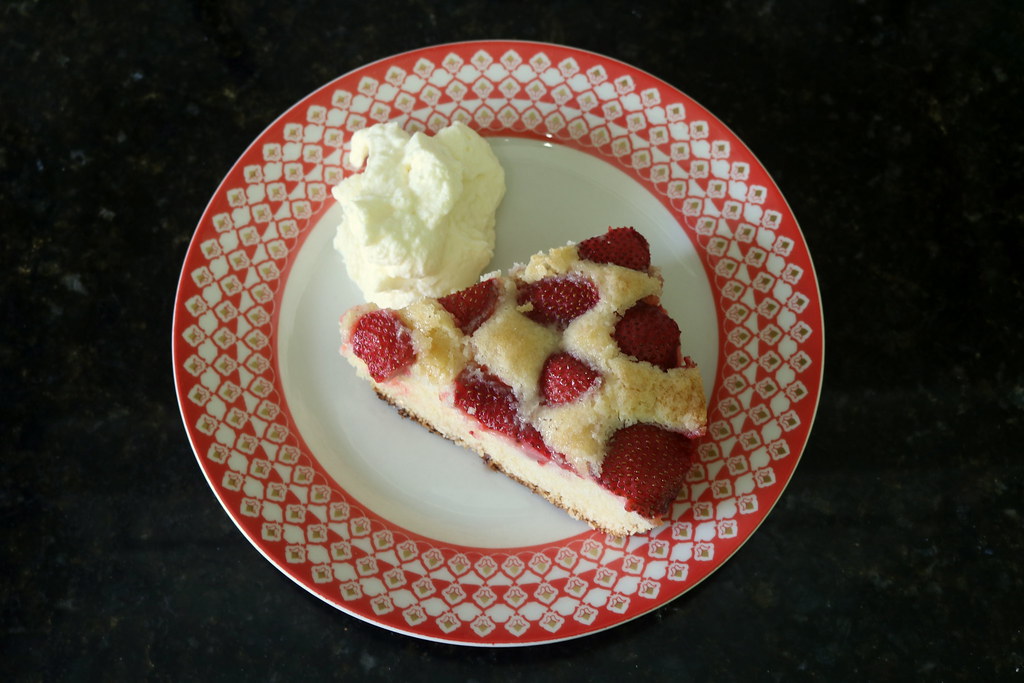
This cake is everything you want from a strawberry cake. I hadn’t had such a good cake – and such a pretty one – in a long time! The best thing is that it’s not very hard; actually, it comes together reasonably quickly.
When the cake came out of the oven, Sky asked me: do we have cream? I opened the fridge and saw a small package of cream. I whipped it to serve with the cake, making our dessert even richer!
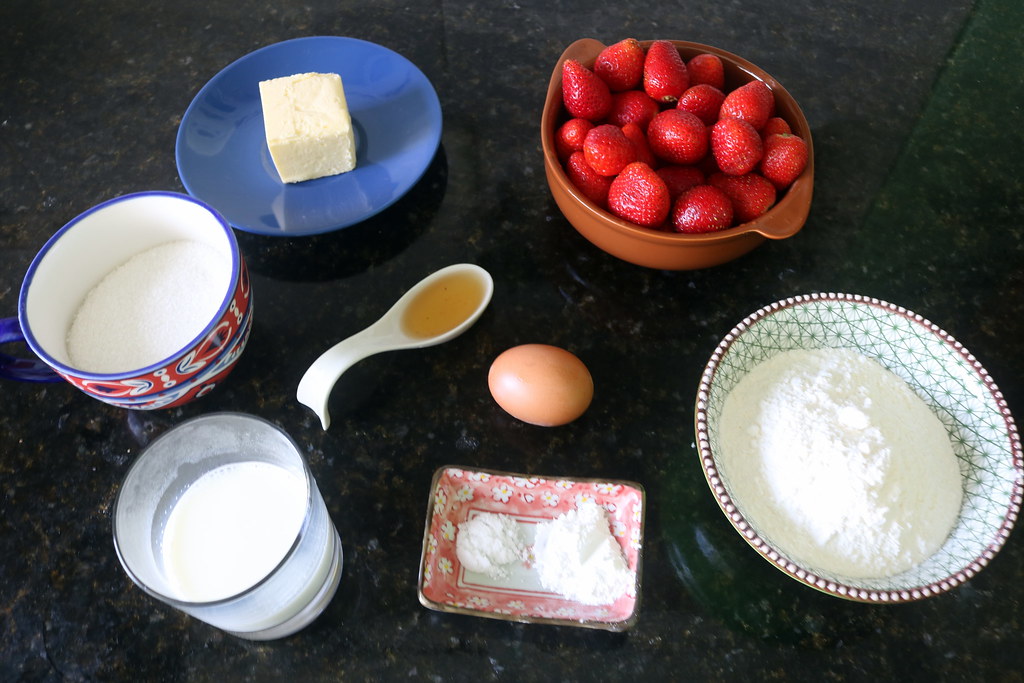
For a 10-inch cake, you’ll need:
85g (6 Tbsp) butter, softened
200g (1 and 1/2 cup) flour
1 1/2 tsp baking soda
1/2 tsp salt
200g (1 cup) sugar, plus 2 Tbsp to sprinkle over the cake – I used regular sugar in the batter, and turbinado sugar to sprinkle over the cake
1 large egg
1/2 cup milk
1 tsp vanilla extract
400 g strawberries, hulled and halved
Butter a 10-inch round pie plate and pre-heat the oven to 180 C (350 F). It is such a quick process that I actually started pre-heating the oven before making the batter 😀
Start by sifting together the flour, salt, and baking powder. I must confess I never sift – I follow Chef John’s trick of whisking them thoroughly for 2 minutes. This gets rid of any lumps and saves me from having to wash the sieve! 😀
Using your stand mixer, cream the butter with the sugar. The recipes usually say something about “mix until the cream is pale,” but Uruguayan butter is pretty yellow, so that never really happens – it has never stopped me from baking anyway, though!
Add the egg and mix well. Then, add the milk and vanilla, mixing well. At this point, the mixture looked a bit curdled, which is normal for this kind of cake.
As usual, to avoid over-mixing the batter, at this stage I change to a hand whisk. Add the flour mixture little by little, mixing just until you can’t see any flour specks.
Transfer the batter to the buttered pie plate. Place the strawberry halves over the dough, cut side down. Try to place them as close together as you can!
Sprinkle 2 Tbsp of sugar (I used turbinado) over the strawberries and bake at 180 C (350 F) for 10 minutes. Then, lower the temperature to 170 C (325 F) and bake until it’s golden and a toothpick inserted into the middle comes clean – the recipes said this would take about an hour, but in my oven it took only 45 minutes.
Let the cake cool over a wire rack and serve with whipped cream!
Mimosa Gelatin
I hadn’t had gelatin for a LONG time! I mean, I didn’t really miss that overly sweet dessert with those bizarre artificial flavors. But when I started to think about what to make for Summer Tertulias, the idea of gelatin kept coming back to me. I decided to find a homemade version.
I found several recipes, among them Patricia’s tangerine and prosecco gelatin. I decided to try that one, subbing orange juice for the tangerine, to make a solid version of one of my favorite drinks!:D
The first time I tried, it didn’t work. It wouldn’t set, so I placed it in the freezer and ate frozen mimosas (No complains here, it was super tasty! :D)
But I’m stubborn, so I decided to try again, increasing the amount of gelatin and changing the way I added it on the recipe. It worked! I served with a spoonful of whipped cream and it was a hit!
For four servings, you’ll need:
200 ml freshly squeezed orange juice
1 Tbsp sugar
1 Tbsp powdered gelatin
3 Tbsp water
100 ml sparkling wine – I used rosé, because that’s what I had in the fridge!
Optional: whipped cream, to serve (I didn’t add sugar to the cream, as orange juice is quite sweet!)

Making gelatin is pretty easy. Sure, not as easy as mixing the flavored package into warm water, but then again, the homemade version tastes much better! 😀
In a small pan, mix the orange juice and the sugar. Mix well and heat over medium heat until it simmers. Remove from the heat, cover, and set aside for about 15 minutes.
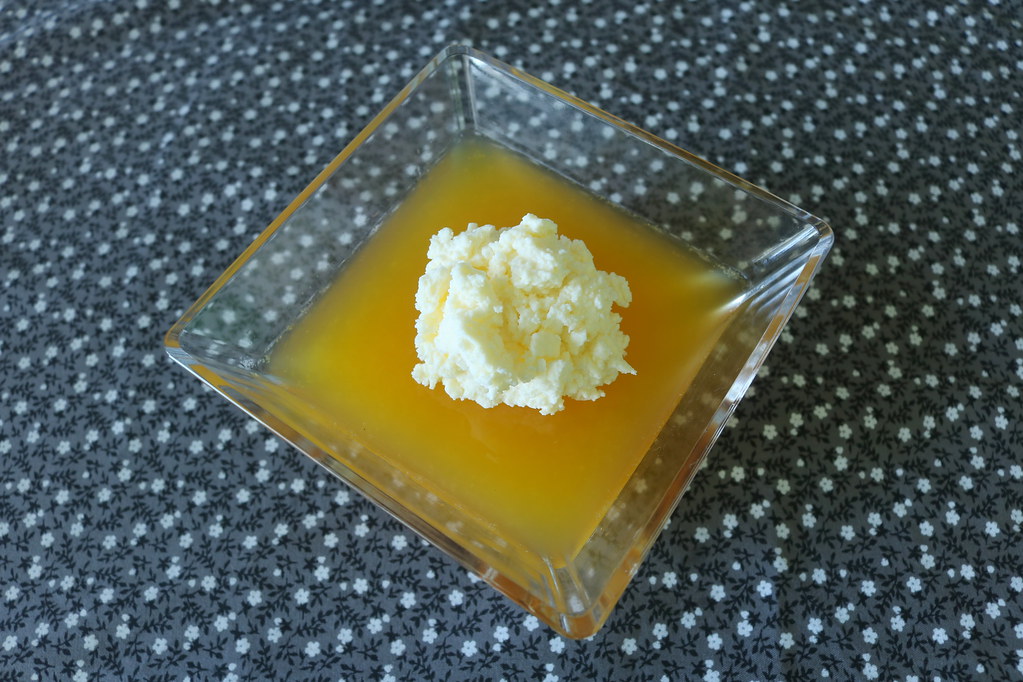
In a small bowl, mix the powdered gelatin and water and let it hydrate for 10 minutes. After this, the mix will be pretty solid. Place this small bowl in a larger bowl with hot water – don’t put too much water: think “water bath,” but off the stove! Stir the gelatin mix until it turns liquid.
When the gelatin is liquid and clump-free, pour it in the pan with the orange juice. Add the sparkling wine, whisk well, and strain the mix.
Pour over four serving bowls, cover with plastic wrap, and place them in the fridge for about 3 hours, until they set. Serve with a tablespoon of whipped cream.
Pecan Pie Mini-Muffins

Of the recipes I made for this holiday series, this was the biggest hit BY FAR! As it yields 24 mini-muffins, I thought I’d have some leftovers to freeze, but they disappeared! I had to make it again, so I could take the pictures – and once again, there were no leftovers! 😀
This is a pretty easy recipe: only five ingredients, and you don’t even need a stand mixer! The hardest steps are chopping the nuts and buttering the mini muffin tins. This last step is mandatory, though – I tried making it with paper cups, and it all got stuck! 😦 #truestory
You’ll need:
1 cup brown sugar – press well into the measuring cup!
½ cup all-purpose flour – yes, that’s all it takes!
1 cup pecans, chopped – chop first, then measure
2/3 cup (150 g) melted butter
2 large eggs

This is easy! Start by thoroughly buttering the mini-muffin tins.
In a bowl, mix the brown sugar, the flour, and the chopped pecans. In another bowl, lightly whisk the eggs and add the melted butter. Now all you have to do is combine both bowls!
Fill the well-buttered mini-muffin tins 2/3 of the way. Bake in a pre-heated oven for about 20 minutes, or until a toothpick inserted into them comes out clean. With the help of a butter knife, remove the mini-muffins from the tin right away. Let them cool on a wire rack.
When they are completely cooled, place them in a nice gift box and brighten someone’s day! 🙂
