Gazpacho Blanco
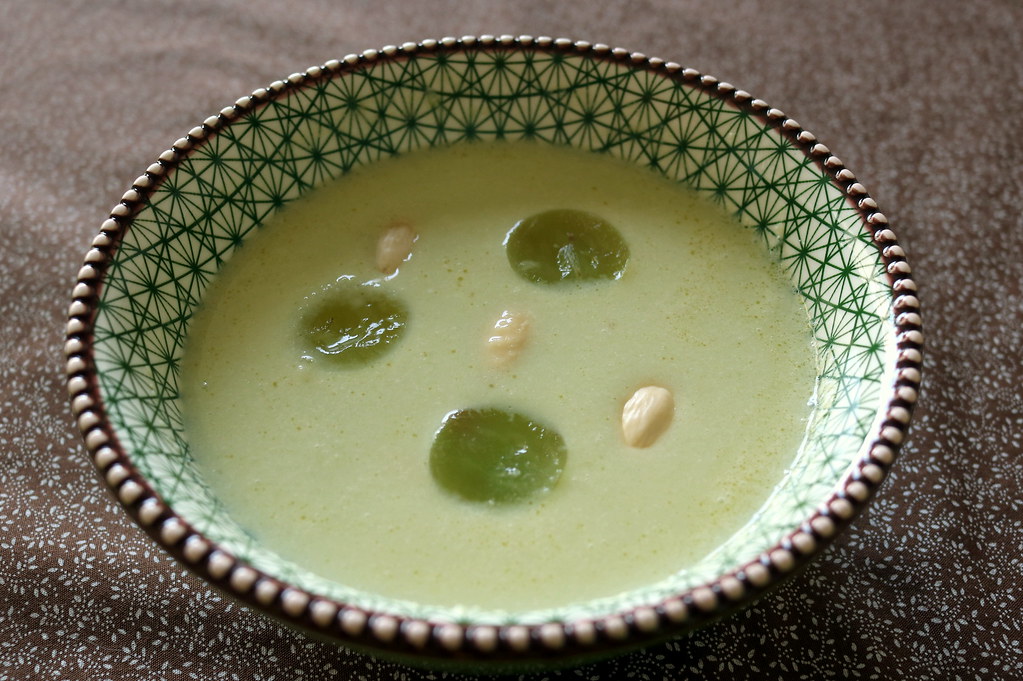
Cold soup. A lot of people dislike the idea, but I honestly think it’s because they’ve never given it a chance: cold soups are the best thing for summer! To date, this is my favorite cold soup. While I find it super weird calling gazpacho something that doesn’t have tomatoes in it, that’s how Chef John called it!
Is it the easiest recipe ever? No, not even close. But it’s worth it. Seven years ago, when I moved to Uruguay, I didn’t know how to cook the most basic of the foods – my repertoire consisted of pasta with store-bought sauce, tuna salad, and basic chocolate cake! Now I can cook a sophisticated-tasting cold soup. I can’t help but feel proud!
For 4 portions, you’ll need:
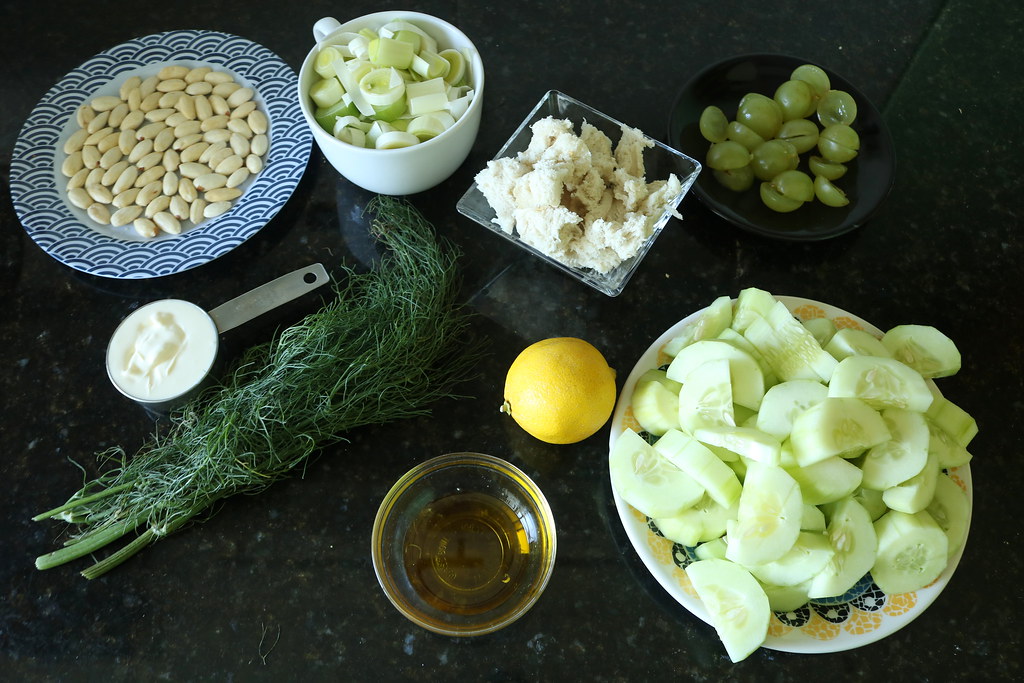
2 Tbsp olive oil
1 cup leeks, washed and chopped – chop, then measure. Use only the white part, or else your soup will be green! Save the green part for vegetable stock
2 English cucumbers, peeled
10 seedless green grapes – I just cut regular grapes and removed the seeds
¼ cup chopped blanched almonds – you can also use slivered almonds
1/3 cup sour cream or plain yoghurt
1 generous cup of bread cubes
2 Tbsp lemon juice
Salt, pepper, and cayenne
1 ½ cup cold water – you may need more
(optional) dill
Did you know you can blanche almonds at home? I learned that for this recipe, as I tried, but couldn’t buy blanched almonds! Soak them in boiling water for one minute. Drain the boiling water and soak the almonds in cold water for another minute. Drain again and place the almonds over a dry dishcloth. Rub the almonds using the dishcloth and see how easy that skin comes off! Chop the almonds, measure ¼ cup and set aside.
In a small pan, heat 1 Tbsp olive oil and cook the leeks in médium heat for 10-15 minutes, until it softens. Set aside and let it cool completely. Peel the cucumbers and chop them into medium-sized pieces. Set aside.
When the leeks are cooled, it’s time to blend. Place the cucumber, leeks, grapes, almonds, sour cream, bread, lemon juice, 1 tsp salt, water, and dill in the blender. Blend well and, if necessary, add a bit more water. Try not to add too much, we want a thicker soup.
When the mixture is wel blended comes the boring part: passing the soup through a fine strainer! The idea is to remove the little chuncks/skin/whatever, so don’t skip it!
As the trick is to serve this soup VEEEERY cold, fill an ice cube mold with the soup and freeze it. Cover the rest of the soup and place it in the fridge for about three hours.
When the soup is nice and cold, taste for seasoning: I had to add more pepper and cayenne. To serve, place a couple frozen soup cubes in a bowl and cover with the cold soup. Add a few drops of olive oil, sliced grapes and slivered almonds and you have a delicious (and fancy) soup!
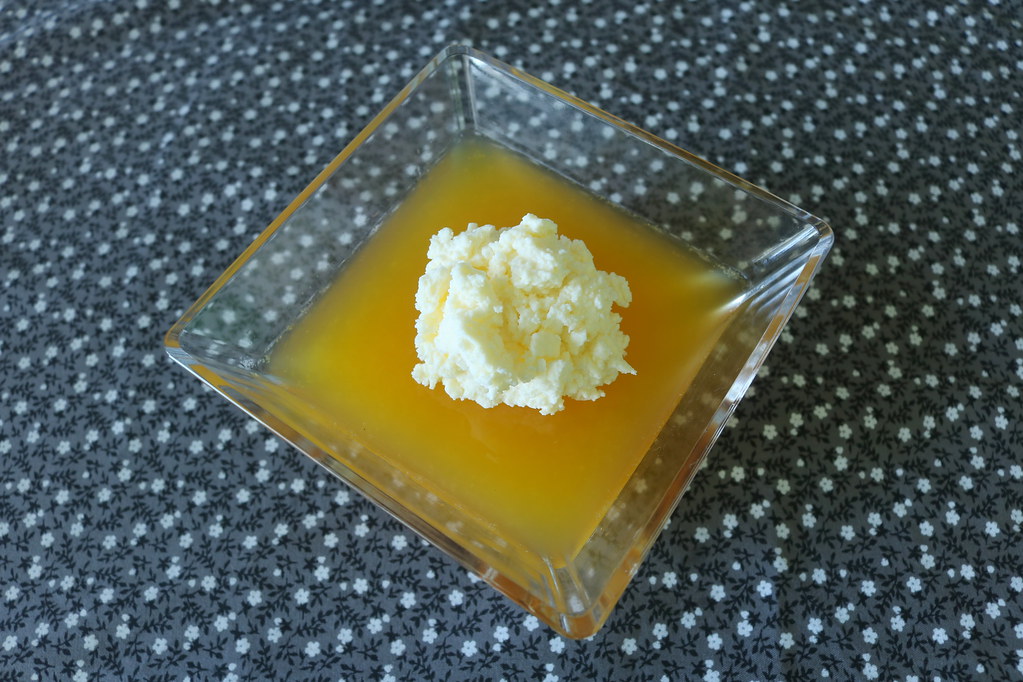
Mimosa Gelatin
I hadn’t had gelatin for a LONG time! I mean, I didn’t really miss that overly sweet dessert with those bizarre artificial flavors. But when I started to think about what to make for Summer Tertulias, the idea of gelatin kept coming back to me. I decided to find a homemade version.
I found several recipes, among them Patricia’s tangerine and prosecco gelatin. I decided to try that one, subbing orange juice for the tangerine, to make a solid version of one of my favorite drinks!:D
The first time I tried, it didn’t work. It wouldn’t set, so I placed it in the freezer and ate frozen mimosas (No complains here, it was super tasty! :D)
But I’m stubborn, so I decided to try again, increasing the amount of gelatin and changing the way I added it on the recipe. It worked! I served with a spoonful of whipped cream and it was a hit!
For four servings, you’ll need:
200 ml freshly squeezed orange juice
1 Tbsp sugar
1 Tbsp powdered gelatin
3 Tbsp water
100 ml sparkling wine – I used rosé, because that’s what I had in the fridge!
Optional: whipped cream, to serve (I didn’t add sugar to the cream, as orange juice is quite sweet!)

Making gelatin is pretty easy. Sure, not as easy as mixing the flavored package into warm water, but then again, the homemade version tastes much better! 😀
In a small pan, mix the orange juice and the sugar. Mix well and heat over medium heat until it simmers. Remove from the heat, cover, and set aside for about 15 minutes.
In a small bowl, mix the powdered gelatin and water and let it hydrate for 10 minutes. After this, the mix will be pretty solid. Place this small bowl in a larger bowl with hot water – don’t put too much water: think “water bath,” but off the stove! Stir the gelatin mix until it turns liquid.
When the gelatin is liquid and clump-free, pour it in the pan with the orange juice. Add the sparkling wine, whisk well, and strain the mix.
Pour over four serving bowls, cover with plastic wrap, and place them in the fridge for about 3 hours, until they set. Serve with a tablespoon of whipped cream.
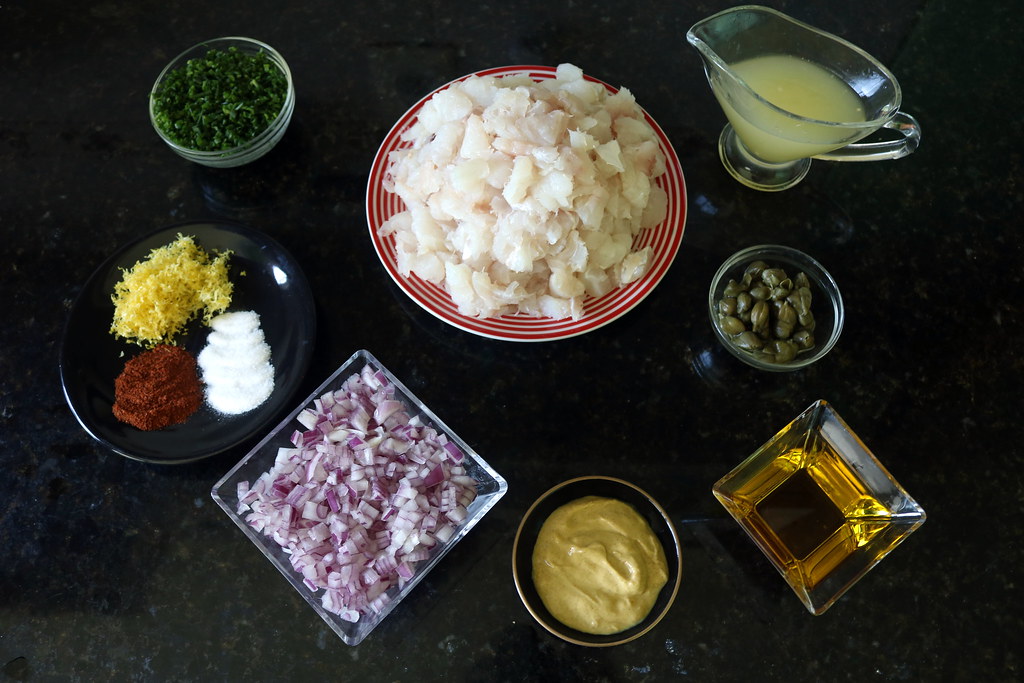
Crudo Siciliano
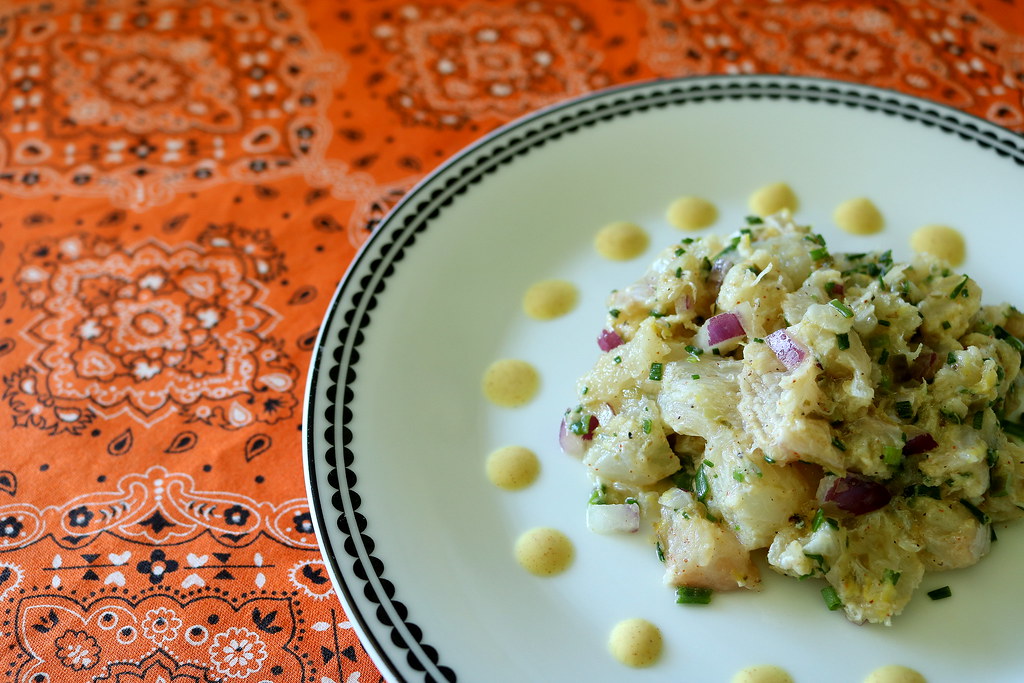
One of the best restaurants here in Uruguay is La Huella, in José Ignacio. We don’t go there very often, but it’s great every time. Last year, on my birthday, we shared several starters, but one was really special: it was similar to ceviche, but with some very different flavors.
I was intrigued, of course. When we asked for the check, the waiter told us they had a recipe book. I asked the obvious question: “Is this recipe in the book?”. A few minutes later, he came back and said that the recipe was not in the book, but that the chef would happily teach me how to make it! Obviously, I accepted! As you would expect, she didn’t give me exact measurements, but a good idea of the proportions.
I was sure I would cook that the next week, but I ended up not doing it. In fact, I procrastinated so much that I only cooked this now, for Summer Tertulias! 😀
For a light lunch for 4 people, you’ll need:
Approximately 800 g white fish, deboned – she used sea bass, I used brótola, so you can choose whatever white (and firm) fish. If you’re cooking for less people, reduce the amount, as this is best served immediately after it’s made.
Salt
Cayenne pepper
Black pepper
½ red onion, very finely chopped – don’t grate it!
1 bunch of chives, very finely chopped – you can also use mint
1 heaping Tbsp Dijon mustard – next time, I’ll double the amount
2 Tbsp capers
Zest of one lemon
Juice of one lemon
Olive oil – roughly the same volume as the lemon juice
Start by chopping the fish into small cubes – mine were a little too big! 😦 It’s supposed to be smaller than your regular ceviche cubes. Season the fish with salt, cayenne pepper, and black pepper. Place it back in the fridge, so it won’t lose its consistency.
Chop the red onion as finely as you can – do not crush or shred: the goal is to have mini cubes here! Chop the chives and the capers very finely, too – the capers will turn almost into a paste, don’t worry. In a bowl, mix the onion, the chives, the capers, the lemon zest, and the Dijon mustard. Set aside.
In another bowl, emulsify the lemon juice and olive oil. This is how I did it: I placed the lemon juice in a bowl and poured the olive oil slowly, whisking well. That required a lot of elbow grease, of course. I later looked it up and it turns out you can do that with a hand mixer! I’ll try that next time! Set the emulsion aside.
When you’re ready to serve, all you have to do is combine the fish with the onion mix and this emulsion in a big bowl. Taste (and adjust the seasoning) and serve with a nice green salad!
Vietnamese Spring Rolls
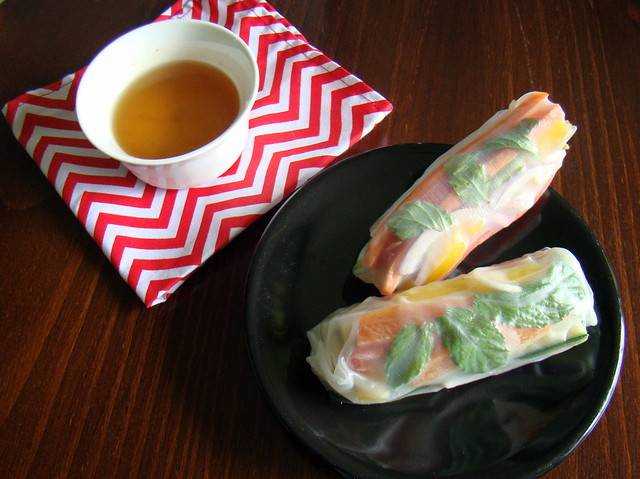
A friend of mine has an Asian-inspired closed-door restaurant here in Punta. When I went there for the first time, I saw “spring rolls” on the menu and I ordered it, thinking I’d get the Chinese fried version. Instead, he brought pockets of raw vegetables. I tried them, skeptically, but I loved it! Very fresh and light!
To end our Summer Tertulias, I decided to make that recipe. It isn’t hard, but it takes a while to roll everything. It’s totally worth it, though, and they last a few days in the fridge – a healthy snack option. They are very versatile: you can fill them however you want. I made the vegan version, but you can add boiled shrimp, for example.
The rice paper used for these spring rolls can be found in health/Asian stores. Here in Uruguay, I found them on the gluten-free section of the supermarket (the celiac population here is surprisingly big: we had a gluten-free section before it was cool 😀 ).
The quantities listed here are simply a suggestion – adjust however you like!
1 packet of rice paper wraps
1 cucumber, julienned – I still haven’t mastered the cut, though…
1 carrot, julienned
1/3 green bell pepper, julienned
1/3 red bell pepper, julienned
1/3 yellow bell pepper, julienned
1/2 red onion, thinly sliced
1 packet of bean sprouts – alfalfa sprouts work nicely too, but I didn’t find them in the market! 😀
Mint leaves
Lettuce
Sauce
4 Tbsp soy sauce – traditionally, fish sauce is used, but then the recipe is no longer vegan. I tested both and they are equally good.
1 Tbsp sugar
Juice of half a lemon
2 garlic cloves
1 cup of water
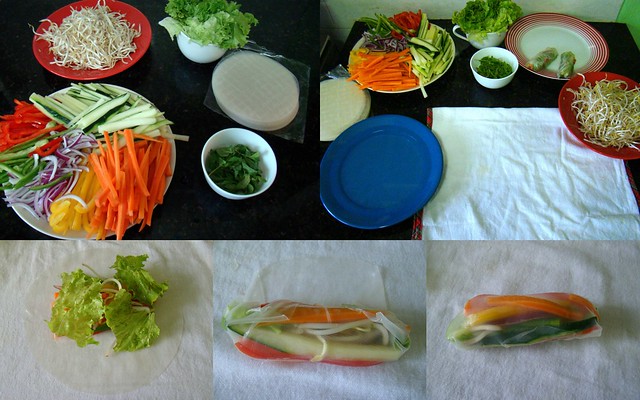
Start by prepping all the vegetables.
Then, set up your workstation: the veggies, the sprouts, the mint, the rice paper, a deep plate with water (to soften the rice paper), a clean dish towel, and a plate to place the finished rolls.
Place one wrap on the plate with water and let it sit for a minute. It will be quite soft! Carefully, remove the wrap from the plate and place it over your towel, trying to keep it from curling. The first few times it may be a little troublesome, but you’ll get the hang of it in no time!
Place the filling on the center of the wrap, being careful not to overfill. Fold the bottom part of the wrap over the filling, fold both sides into the center, making an envelope, and fold the top part over, closing the roll. Repeat until you run out of wraps or filling! 😀
Mix the sauce ingredients and serve!
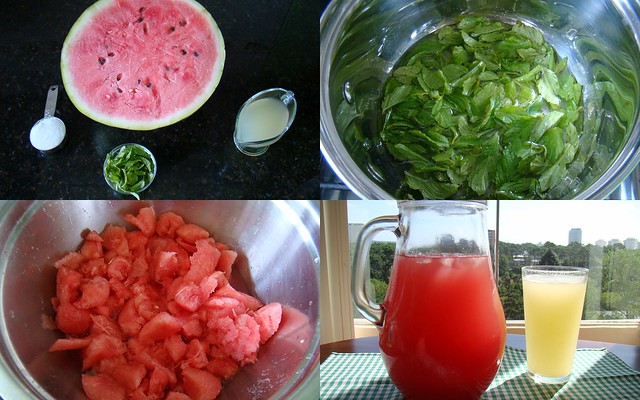
Watermelon-Mint Agua Fresca
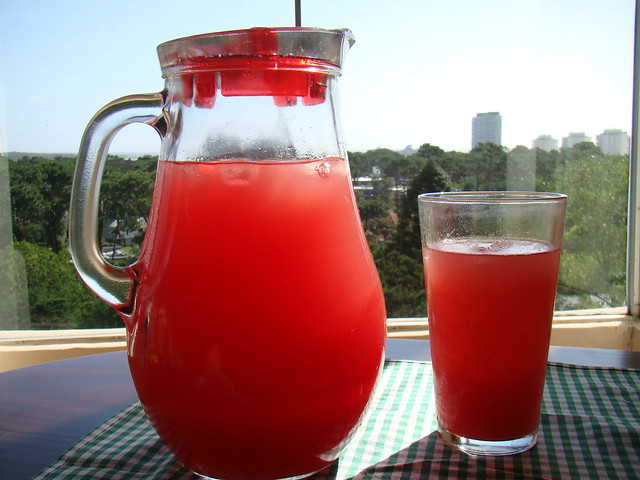
For the third recipe of the Summer Tertulias, I decided to make the first drink of the blog! 🙂 While researching “summer recipes” on Pinterest, I came across “agua fresca,” a very refreshing Mexican drink – the middle point between juice and flavored water 😀
Among the several options of agua fresca, I decided on this Epicurious version, which has an interesting detail: homemade mint syrup. I had never made syrup before, and was surprised at how easy it is! The coolest thing is that you can use the same syrup to make pineapple agua fresca!
For a big pitcher of agua fresca, you’ll need:
5 cups of watermelon, seeded – I used half a medium-sized watermelon and decided that was 5 cups 😀 For the pineapple version, I used roughly 2 cups of fresh pineapple, chopped.
1/4 cup of lemon juice
A LOT OF ICE (I used two trays)
For the mint syrup:
1/4 cup mint leaves
1/4 cup sugar
1/4 cup water
In a small saucepan, place all the ingredients of the syrup and bring to a boil over medium heat, stirring well to dissolve the sugar. Remove from heat and let it chill completely.
While the syrup cools down, remove the seeds of the watermelon and chop it. When I was done chopping, I remembered I had a pineapple that needed to be used as well. As I had doubled the syrup recipe, I decided to make pineapple agua fresca – the method was exactly the same, but I only used 2 cups of chopped pineapple.
Place the watermelon, the lemon juice, and the mint syrup in a blender and blend until smooth. Strain the contents directly over the pitcher. Add two cups of water, mix well, and add plenty of ice. Serve ice cold!
Freezer: Place the agua fresca in a popsicle mold and freeze – it will be a hit! 🙂
Quick-cured Salmon
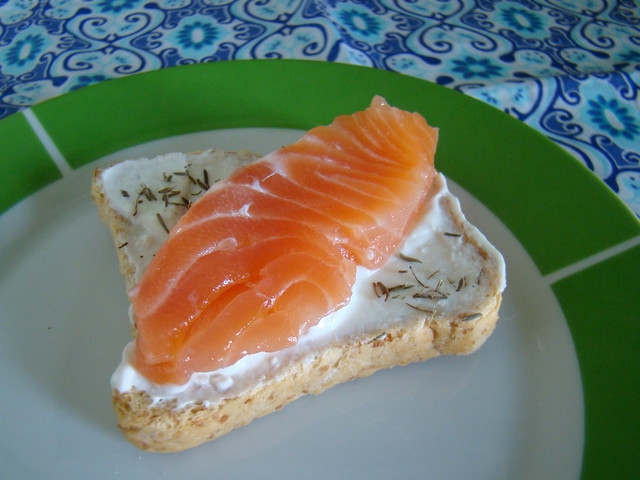
For the second recipe of the Summer Tertúlias, I finally photographed one of my favorite recipes! This is a great thing to have on the fridge for a quick lunch – a simple salad or sandwich with a few slices of this salmon will get the job done. And what’s more, this recipe does not require a stove, which is ideal for the hot weather down here!
This must have been the first recipe I’ve watched from Chef John. Naturally, after testing it I became a fan! On Christmas, we served it with mini toasts and cream cheese, which I spiced with dill and pepper – it was a hit!
You’ll need:
1 piece of salmon – mine was approximately 1 kg, but the size doesn’t really matter, as the brine is the same
For the brine:
2 1/2 cups cold water
1/3 cup sugar
1/2 cup salt
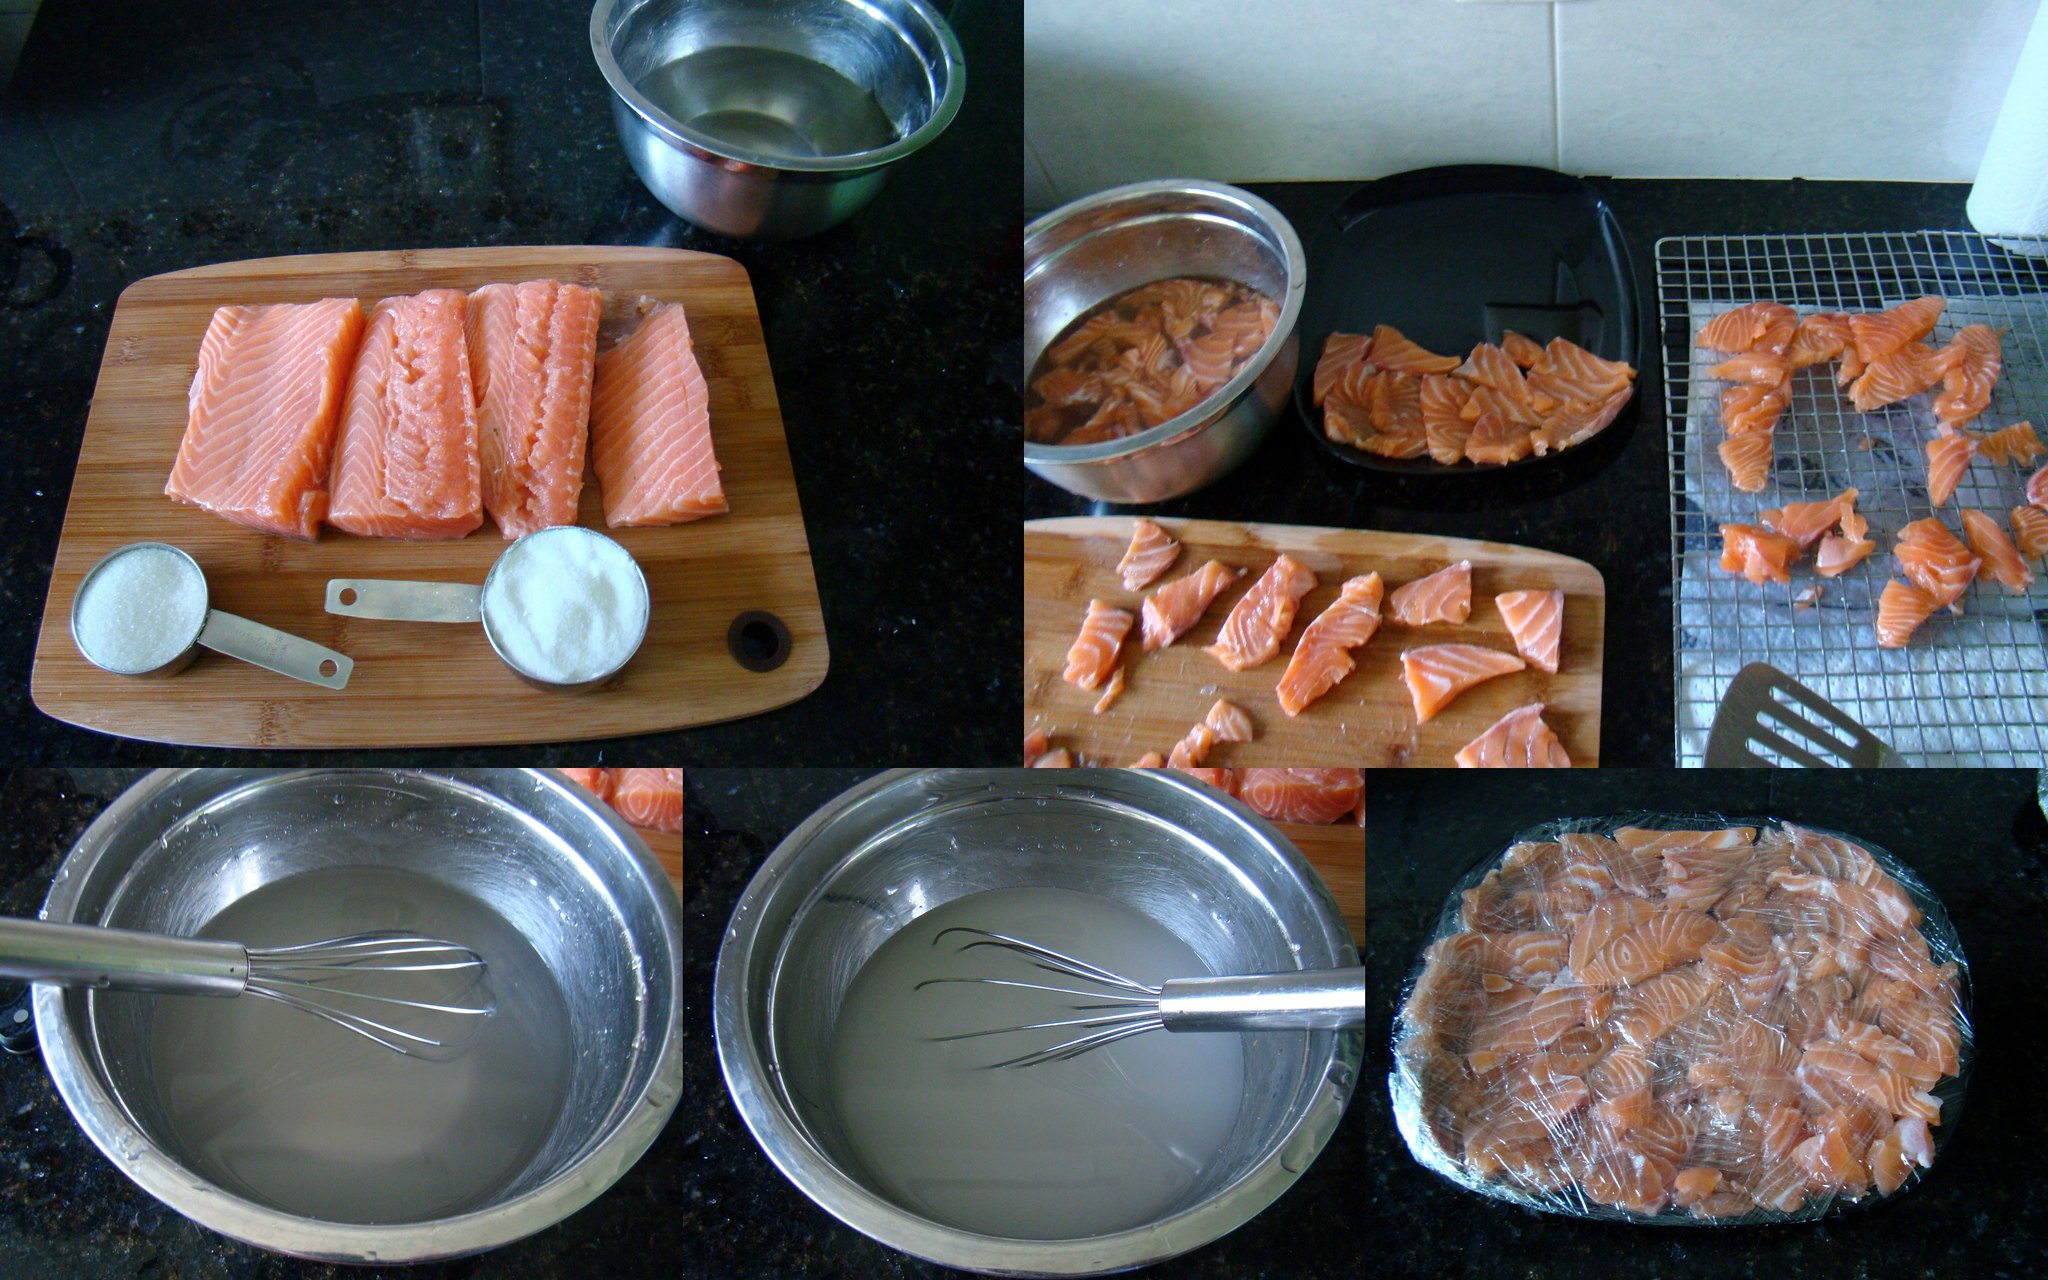
Start by removing the skin – or be smart and buy your salmon without the skin. With patience (and a sharp knife), the skin will come off.
Slice the salmon as if for sashimi – that is, 0.5 cm thick, give or take. It’s no big deal if your slices are thicker – all you have to do is leave them a little longer in the brine!
For the brine itself, you’ll need a bit of arm strength and faith: stir all the ingredients in a medium-sized bowl until the liquid is once again clear. For the first two or three minutes of stirring, you’ll be thinking “this is never going to get clear,” but here’s where the faith (and arm strength) comes in: it WILL turn clear, just keep stirring! 🙂
Set up a little workstation on your counter: the sliced salmon, the brine bowl, a clean plate to place the salmon when it’s ready, a cooling rack, and your cell phone (or a kitchen timer, if you’re feeling fancy). If you don’t have a cooling rack, just place some paper towels on your counter to soak up the excess liquid.
Place a few pieces of salmon in the brine and set your timer for three minutes. Don’t overfill the bowl – a single layer will do. When your timer rings,
transfer the pieces to the cooling rack (or paper towel stack). Put a new batch of salmon in the brine and repeat the process.
As the salmon dries off a little, place the pieces on a place – they should be close together, but not stacked. Cover the plate tightly with plastic wrap and refrigerate for 12 hours.
Serve with toast and cream cheese, or simply with some soy sauce!
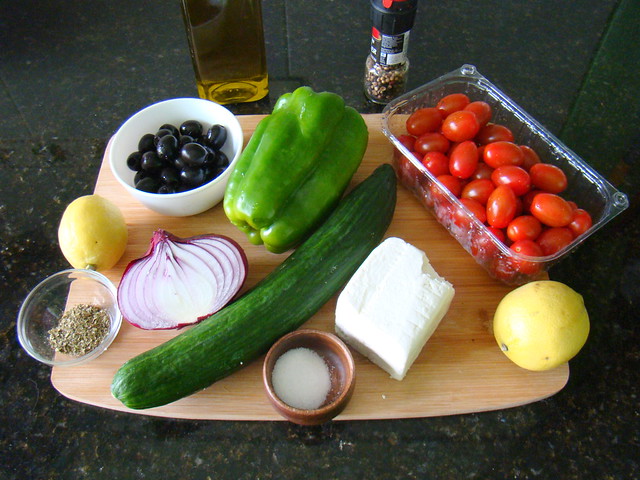
Greek Salad
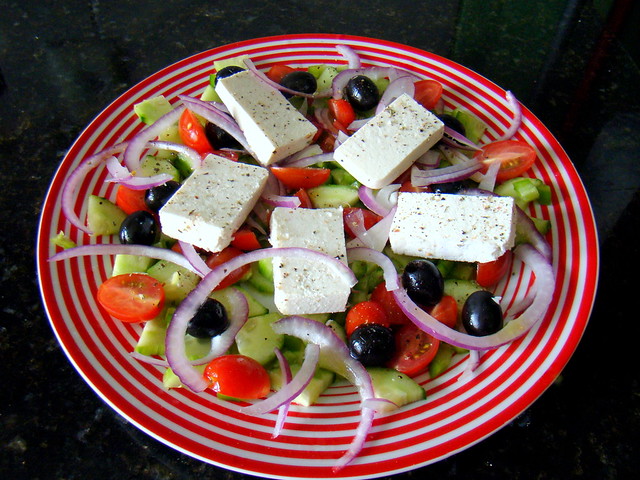
January in the Southern Hemisphere is always the same deal: it’s too hot, “this year I’ll eat healthier, I swear,” “did I mention it’s hot in here?,” etc. So, nothing better than starting the year with Summer Tertulias – a series of light recipes that go hand in hand with the hot weather! 😀
Today’s recipe is a very very tasty LETTUCE-FREE salad (I don’t really care for lettuce). The coolest thing is that you only get the cutting boards and the plates dirty, no need for a salad bowl! Deb’s original recipe called for feta, but I’ve never found it here in Uruguay – I used hard ricotta and it worked great. You can also use goat cheese, it’s excellent!
For two people, you’ll need:
1 cucumber
1/2 green bell pepper
1 cup of cherry/grape tomatoes
1/4 cup of black olives – you can skip it, if you want. I won’t understand it, but you can do it, it’s your salad after all!
1/2 medium-size red onion – mine was big, so I used 1/4.
Thick slices of feta, ricotta, goat cheese, or grilled tofu for a vegan version
juice of 1 lemon – I got carried away and used 2, but the original recipe calls for just one 😀
olive oil, salt, black pepper, oregano (fresh oregano would be the ideal thing here, but I only had dried leaves, so that’s what I used)
Assembling this salad is super easy.
If you think that raw onions are too strong, you can slice it thinly and let it soak in the lemon juice while you chop the rest of the ingredients. I love raw onions (mom will tell you all about how I used to steal raw onions from the fridge when I was five), so all I did was slice it thin! 😀
Cut the cucumber into medium-size bits, the bell pepper in small cubes, and the cherry tomatoes in half. I placed the ingredients on the plates as I chopped them, to spare one dish! #lazypeoplehack
Place the olives and the cheese slices on the salad, and dress it with the lemon juice (even if you’ve soaked your onions in it), olive oil, salt, pepper, and the oregano leaves.
Eat and feel virtuous that you are sticking to your new year’s resolution (for now…) 😀
